Pinterest meta tag

Showing posts with label Food and Beverage. Show all posts

Friday, June 20, 2014

Eat like a fancy pants on the cheap!

Ok, so the title of this one is "Eat like a fancy pants on the cheap" but what should be tagged on to the end of the sentence is "the Japanese way:" because this episode of "how to make your life a little more awesome for less" is brought to you by RAMEN!


Whether or not you've been to college I'd put money on the fact that your early twenties was spent eating like you were trying to afford it. And why not? at 15 cents a meal (which happens to actually be delicious) its hard to beat. Then later on your got a little smarter and learned about nutrition...

You probably know now (or will learn soon) that Ramen is just carbs, sallt, and fat - and while you can get full and happy on about a dollar a day (on average) you are gonna burn out soon, and all of that thinking you like to do throughout the day will because pretty monotone.

For not much more you could actually be eating like a pro, and still have a deliciously quick and easy meal going for ya! I put all of my effort, money and work into dinners for my family. With a husband set like a lumberjack and 2 kids I dont have a lot of time but need to come up with a lot of food, and WAY too often I forget to feed myself throughout the day. Here are some of my "Ramen Hacks" that keep me and my son fueled through the day while enabling me to continue on my journey to actually having a clean house:

AS I WRITE THIS Im actually eating some AMAZING ramen. I took a package of beef ramen, cooked the noodles with an egg (like egg drop soup) some chopped green onion, a sprinkle of garlic powder, and a LOT of fresh spinach (about 2 cups - when that stuff cooks it doesnt go very far) When its done I poured a good amount of liquid out, added the flavoring powder, and then dug in! No one even missed me while I was feeding my own face - THATS how quick it was! It was SOOOO DELICIOUS that I fed it to my husband (as a way to brag about how lucky he is to have such a great wife that saves him money and feeds him nutrients) and he was impresssed!


So it isnt rocket science - and there is no recipe per se - its all up to you, but consider just keeping some staples around the house when you think you'll be broke for a while, or if you just feel nostalgic.... or really hungry for sodium.

Try some Spices like salt, pepper, garlic, powered turmeric, steak grilling seasonings.. I dunno, this is YOUR adventure!
Try these Veggies (Just toss them in the water while the noodles are cookin):

  • Spinach
  • Lettuce/Cabbage
  • Sprouts
  • Beans
  • Scallions/Green onion
  • Broccoli/Cauliflower
  • Carrots
  • Onions
  • Mushrooms
  • Any frozen veggies you have inthe freezer.. even corn would be an adventure!
Try some MEAT! Any meat cooked, cubed, chopped, sliced, etc would make a FINE addition to your ramen. even if its pepporoni slices!
Try some EGGS! They are a cheap and easy way to add protein and a lot of other vitamins. This has always been the easiest way to get it into my little boy too!
(I took the following "Level system" on ideas for eggs from THIS link)

  • Level 1: Hard boiled eggs are the easiest—just add the eggs to a pot of cold water, bring it to a boil, then drop in your noodles. The egg should be pretty perfectly hard boiled in just about the same time that it takes to cook the ramen through.
  • Level 2: Soft boiled eggs are a tad trickier, because they involve a time. Drop them into the pot after it's come to a full boil, start a timer, and pull them out after 3 minutes for super-soft, or 5 for a fully-set white and semi-liquid yolk. I like to cut the eggs open and stir the yolk into the broth as I eat it.
  • Level 3: The egg-drop method creates small curds of egg blossoms that float in the broth and coat your noodles. Lightly beat an egg in a small bowl. Once your noodles are cooked, swirl the noodles and hot broth gently around the pot. While the broth is moving, slowly drizzle in the beaten egg. It should set into fine ribbons.
  • Level 4: Poached eggs will never come out perfectly shaped, but who really cares? Just cook the noodles until they've just started to separate from each other (about halfway through their total cooking time), pull the pot off the heat, break a raw egg into the center, place the lid on the pot, and let the whole thing sit for a couple minutes until both the noodles and eggs are cooked.
  • Level 5: Fried Eggs require the use of an auxiliary pan and heat source. This is hyper-advanced stuff, and not to be trifled with until you've mastered all of the first-level egg techniques.*

And REMEMBER - theres no reason to stay in the orient for this one. The following link has recipes for ramen Pizza, soups, salads, casseroles, omelettes, chimichangas, snack mix, even shephards pie utilizing our 15 cent buddy! CHECK IT OUT, Its actually kinda ridiculous: http://www.buzzfeed.com/ariellecalderon/27-better-ways-to-eat-ramen

Wednesday, June 4, 2014

Need help getting veggies into your kids?

My almost-4 year old makes it pretty impossible for me to get vegetables into his body, and this is obviously a notorious problem with almost all parents. Until I figure out how to convince him that this entire diet cant consist of fruit and bread Ive been resorting to tricking him for years.

This recipe is flawless and allows you to get veggies into them in a delicious and healthy way. Best of all this recipe is entirely customizable, where you use a few necessary ingredients, but other than that you decide what your kid needs the most! Plus, as a bonus theres a quality to this recipe that makes being a mother so much easier - its fast and brainless. Nothing needs to be EXACT, so don't stress! Just dump a bunch of things into a bowl and mix it up!

So I give you.... *drum roll*
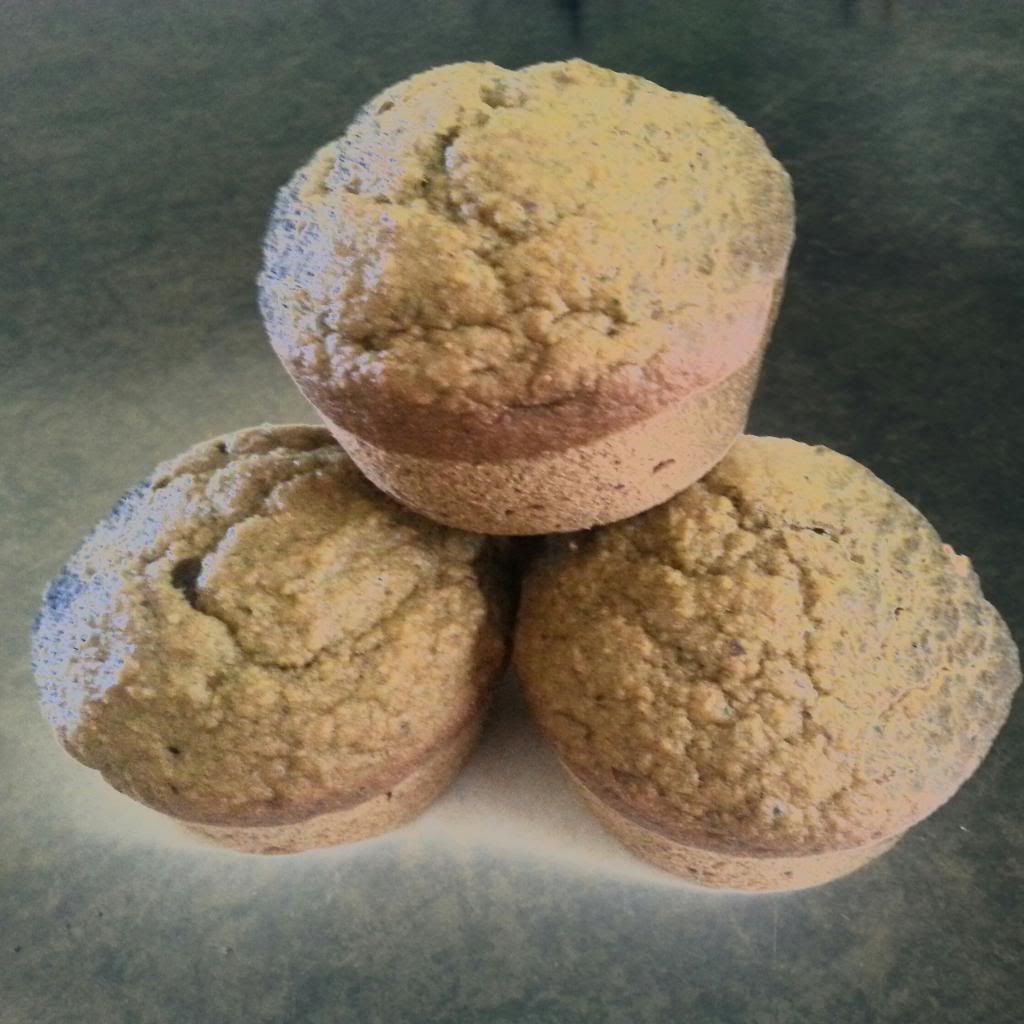
THE HOLY GRAIL OF MUFFINS!

(The number of muffins depends on the tin your using)

2 cups whole wheat flour (or what you have on hand)

about 1/4 cup flax meal (optional)
1/4-1/2 cup whole oats (optional)1 teaspoon baking soda
1/4 teaspoon salt
1/4 cup unsalted butter, softened
about 1/3 cup brown sugar (or other sweetener if you prefer)
2 -3 tablespoons honey (optional - but really adds to the texture and taste)
1 egg
about 3 cups vegetables - Use anything you like, its gonna be blended together. (I use carrots, zucchini and spinach regularly, but you can even use banana, applesauce, berries, etc.)

1 teaspoon vanilla
2-4 teaspoons cinnamon (depending on your preference)
I throw a little turmeric in there too.. just a small amount. It adds color, cancer fighting properties, and a million other great things into the body.

Like I said, mix it up - different veggies, different additives like the flax or oats just to add nutrients. If your kids like nuts Id suggest almonds, too!

  • None of this has to be in any specific order, either....
  • Get the butter out and throw it in a bowl so it will soften up while you get the rest of the ingredients in there!
  • First you want to Puree any of the non-basic ingredients. The veggies, oats, nuts, etc. I even put the brown sugar in the food processor just to make sure it gets broken up. Put it all in there. Puree it until its the consistency of baby food or applesauce.
  • Put the processed food into a bowl, and add the rest of the ingredients.....
  • Heat the oven to 350.
  • Get our your mixer and blend it all up!
  • Fill the cups in a muffin tin to about 2/3 full
  • Bake for 25 minutes!
VOILA! Yummy muffins for pesky children! Good luck getting them to want anything other than muffins after this though....

Tuesday, May 20, 2014

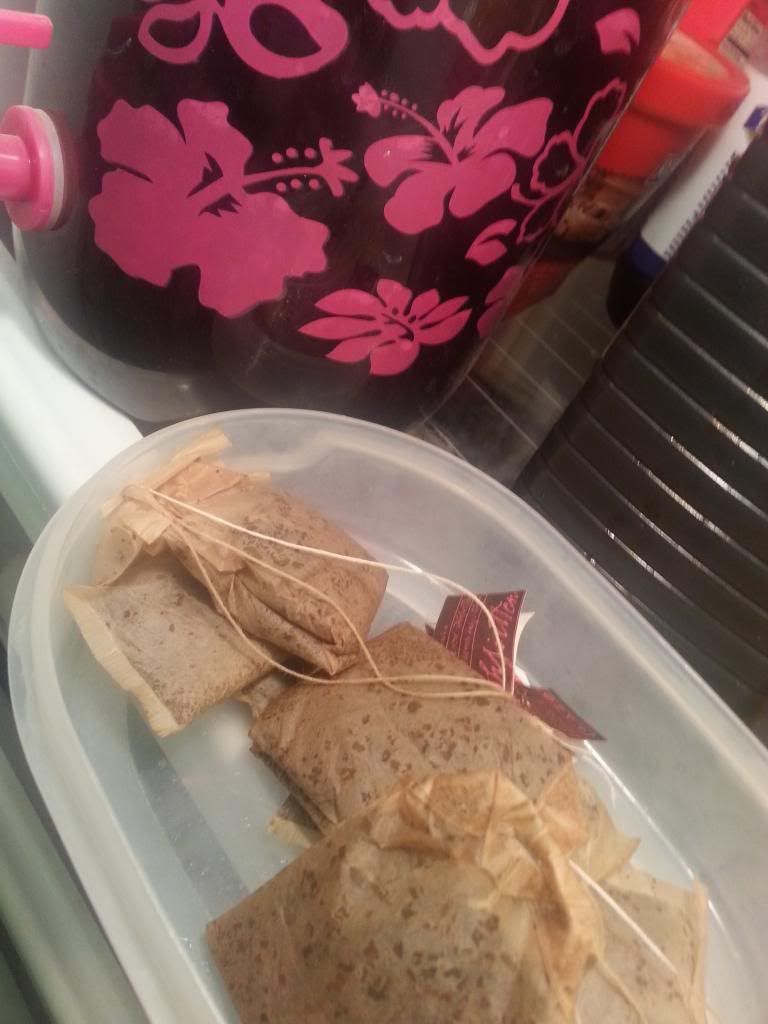
Don't throw em away! Uses for Used tea bags

Yeah, You got me... I don't like to just throw things away...

At least I'm not a hoarder...

And at least I have the decency to let YOU know what you can do to be more frugal in your life too.

And here is where I would normally explain to you why going green and being a frugal mommy dont really stray far from each other - but I would be digressing, and neither of us would really be benefiting, right?

I'll just get right down to it. DON'T JUST THROW EM AWAY.... but don't hang on to them for too long either... eww. Mold and mildew would love for you to, but you're smarter than that - and after this post you're gonna have way too many fun uses for those bags. You''ll be making and drinking more tea just to feel prettier and smarter! Leave a comment later, thanking me - if you ever have time!

Uses for uses (black) tea bags.
(remember that the tea has to be caffeinated unless otherwise specified- this tea contains "tannins" which will be mentioned quite a bit!)


HEALTH AND BEAUTY
  1. Plantar Warts! Just press a wet, warmed tea bag directly on the area for ten to fifteen minutes and let the skin dry naturally. Repeat this daily in one to two weeks that bad boy should be gone! (Let me know if this works, I've never actually had a wart but I've read in a lot of different places that this is a GREAT remedy)
  2. Any kind of tea can soften your skin (the antioxidants in green tea are particularly effective) so throw some tea bags in the bath and soak in that delicious goodness - PLUS, I think you'll smell great after!
  3. The tannins in the tealeaves will stimulate blood circulation and diminish the bags and dark circles under your eyes. Rest either warm or cold bags on your eyes for a few minutes and check out the results! When I get around to it Ill ad a before and after to this post. (Im a great tester since I just had a baby and rarely sleep)
  4. A facial toner!? VOILA! The astringency absorbs greas, so quickly wipe a tea bag over your trouble zones and then blot with a clean towel.
  5. Soothe razor burn and relieve nicks and cuts by pressing a wet tea bag to your skin. Not only will the tea take some of the sting out, it will also stop the bleeding.
  6. Warm up a brewed tea bag, take the leaves out of it, roll them in a scrap of fabric, and use as a compress for a painful toothache, canker sore, or fat lip
  7. Drain a blister or abscess without pain by covering the affected area with a wet tea bag overnight; you'll see results by the time you wake up the next morning.
  8. Tea bags will bring comforting relief if you have a bruise, sunburn, bee sting, mosquito bite, run in with Poison Ivy, or cold sore, reduce inflammation, and promote healing. Put a cool, damp tea bag on the affected area and use like a compress.
  9. The antioxidants and tannins in the tea will tighten your pores, reduce puffiness, and leave your face glowing! Put the used tea bag in a bowl steaming water, place a towel over your head and let your face soak up that tea-steam!
  10. Alleviate sore or bleeding gums by putting a cooled, used tea bag over the problem spot. Tannins constrict blood vessels, which will stop the bleeding, and they reduce the swollen tissues that cause soreness.
  11. Give your feet a daily tea bath that calms and restore. Toss 3 or 4 bags in some hot water and let it steep for about 15 minute (or long enough for the water to cool to a good temp for your footsies.) Then soak for 20-30 minutes. This also gets rid of stinky feet!
  12. Rinse your hands with water and a brewed tea bag to remove food odors like onions and fish!

IN THE KITCHEN

  1. Cook an incredibly moist turkey by adding a brewed tea bag and a cup of water to the pan. The tannin in the tea is a natural meat tenderizer and adds a unique, delicious flavor.
  2. Soak grungy dishes overnight with hot water and a few brewed teabags and the tannins from the tea with break down the grease by morning.
  3. A brewed tea bag will do the same thing as baking soda in your fridge and sucks up odors!
AROUND THE HOUSE
  1. Deodorize stuffy rooms by pouring one quart twice-brewed tea and four tablespoons lemon juice or your favorite essential oil in a spray bottle.
  2. Clean dark leather shoes by wiping a damp tea bag in a circular motion.
  3. Put a wet tea bag or the leaves from a wet tea bag into your ashtray. When someone ashes into the tray the wet leaves will hold the ash and absorb some of the smell from the smoke!
  4. Just sprinkle the dried out contents of a brewed tea bag into kitty litter and the tea will help neutralize the smell!
  5. If you sprinkle the damp tea leaves from a brewed tea bag over the ashes in your fireplace before cleaning it out, the tea will keep the ashes from rising and making a mess when you lift them out.
  6. Wipe cast-iron pots and pans with a brewed tea bag to remove and prevent rust.
  7. Empty the dry contents from several brewed tea bags onto smelly carpets or pet bedding, allow to settle for ten or fifteen minutes, then deodorize the area when you vacuum and leave the refreshing scent of tea behind. This will also deodorize the vacuum cleaner bag at the same time.
  8. Your grandma probably taught you THIS one! Make your mirrors sparkle and shine by using cooled, twice-brewed tea as a cleaner. Just dip a soft cloth in the tea and use it to wipe away dirt and grime, and then buff dry.
  9. Use the teabags to rub furniture and floor scratches to make them disappear.
  10. Carefully spray diluted black tea on the carpet to kill dust mites. Color-test the tea first in an inconspicuous spot.
OUTDOORS
  1. Acid-loving plants like citrus, ferns and roses LOVE Tea! Especially in Arizona, since the ground is dutifully lacking in acid. The tannic acid and other nutrients will be released when you water the plants, spurring their growth.
  2. And for healthier potted plants, place a few brewed tea bags over the drainage hole at the bottom of the planter before potting. The tea bags will retain water and leach nutrients to the soil.
  3. Speed the decomposition process and enrich your compost pile by pouring a few cups of strong, twice-brewed tea into the heap. The liquid tea will hasten decomposition and draw acid-producing bacteria that will create acid-rich compost. If you remove the staples first you can just toss those buggers in your compost pile whole!


    If you know of any more leave a comment! Thanks! I hope This info helps!

      Saturday, December 21, 2013

      Amazing Vegetarian/Vegan banana Pancakes!

      Pancakes are fun because you can make them as healthy or UNhealthy as you want to. I used fun and chemistry to make these vegetarian (would be vegan if it werent for BUTTER but obviously thats an easy replacement away as well.)

      Let me spout off some ingredients and explain to you why science will make you happier and healthier as we go along. This makes enough for about

      First you're going to need to make buttermilk! This can be done with ANY milk alternative (even milk if you really want and don't have buttermilk) I use soy because that's what WIC gives me, but Id prefer coconut milk. Whatever, it gets cooked up so its not that big of a deal.

      • 1 Cup of milk (alternative)
      • 1 Tablespoon of Vinegar (I use ACV for health benefits as well as extra sweetness)

      Stir then let science do its thing for about 5 minutes. ( I usually just do this first and its done by the time everything is ready to be mixed together. It just get thicker and chunkier. Different milks and brands will have slightly different results, but this is of little concern to you.)

      In a bowl mix the dry ingredients, which are:

      • 2 Tablespoons of Sugar
      • 1/2 teaspoon Baking Soda
      • 1 teaspoon of Baking Powder
      • 1/2 teaspoon salt ( I use Himalayan but for the best for your family anything that isn't regular iodized salt will be great!)
      • 1 Cup of flour (special flours like whole wheat, almond meal, or gluten free are always welcome. Try to avoid anything wheat that says "enriched" with vitamins.)
      Now for the butter. If you are using butter you need to melt it. If you are. If not a great alternative is olive oil!
      • 2 Tablespoons of butter OR 1 1/2 Tablespoon of Olive oil. NO Margarine is not a substitute for butter!!! ;)
      Add it to the buttermilk creation, give it a whirl!

      The last ingredient is our egg substitute and the stealer of the whole show. 
      • 1/2 of a fresh banana! 
      Take this and mash it into the dry concoction, mushing it in there as much as possible. Then eat the other half or freeze it for a smoothie!

      Now mix ALL of the ingredients together and mix till its smooth, but it doesn't have to be perfect. Bananas get crazy! Turn the stove on to medium. After that use the mixin spoon to drop about a 1/4 C at a time onto the pan and cook it up! It sould only take a few seconds per side once the stove is all heated up.

      BOOM. Quick, easy. DELICIOUS. These are a stable nowadays. So easy and fun.

      The man wouldn't even stop eating to let me take a picture of my pancake delights!

      Monday, November 11, 2013

      Please stop with the microwaves

      I cant even tell you how many Pinterest pins or recipe websites I see that use the microwave for thing that just make me cringe. Making homemade Mozzarella cheese IN THE MICROWAVE? OH MY GROSS. Making eggs for my TODDLER by just popping them IN THE FREAKING MICROWAVE? THIS NEEDS TO STOP PLEASE.


      A plant that was watered with microwaved water (a young girl did this for her science project)

      When I went to college for nutrition we learned that it specifically retards protein molecules.


      (You can find more info and every days progress at http://usahitman.com/microwave-test/)
      That same website (and many others) lists the following
      Ten reasons to throw out your Microwave oven (taken from research):
      1.  Continually eating food processed from a microwave oven causes long term, permanent, brain damage by ‘shorting out” electrical impulses in the brain (de-polarizing or de-magnetizing the brain tissue).
      2.  The human body cannot metabolize (breakdown) the unknown by-products created in microwaved food.
      3.  Male and female hormone production is shut down and/or altered by continually eating microwaved foods.
      4.  The effects of microwaved food by-products are residual (long term, permanent) within the human body.
      5.  Minerals, vitamins, and nutrients of all microwaved food is reduced or altered so that the human body gets little or no benefit, or the human body absorbs altered compounds that cannot be broken down.
      6.  The minerals in vegetables are altered into cancerous free radicals when cooked in microwave ovens.
      7.  Microwaved foods cause stomach and intestinal cancerous growths (tumors). This may explain the rapid increased rate of colon cancer in America.
      8.  The prolonged eating of microwaved foods causes cancerous cells to increase in human blood.
      9.  Continual ingestion of microwaved food causes immune system deficiencies through lymph gland and serum alterations.
      10.  Eating microwaved food causes loss of memory, concentration, emotional instability, and a decrease of intelligence.
      {Health Freedom Resources, Public Awareness Announcement #1, June 2000, Radiation Ovens, The Proven Dangers of Microwaves.” Also information from the Forensic Research Document, prepared by William P. Kopp, A.R.E.C. Research Operations. TO61-7R10/10-77F05. Written by Anthony Wayne and Lawrence Newell. healthfree.com, Apr. 2003}  Author's comment: The use of artificial microwave transmissions for subliminal psychological control, ‘brainwashing,’ has also been proven. Clinical experiments have been written up by Drs. Luria and Perov. 


      Even if you are one of those cyncical, sarcastic people that think its cool to be unhealthy and like to rub it in others face how you dont care, consider that this is from a mother, who when it comes to her children - is better safe than sorry. It doesnt matter to me or MOST mothers how cool you are, Im not gonna risk anything with my kid.


      ****There is huge controversy over what is fact and what isn't. Its hard to trust any sources so I'm gonna leave it at this: Better dafe than sorry. Is it really THAT important that food is ready in 30 seconds as opposed to 15 minutes?****

      Thursday, September 12, 2013

      All things GINGER

      Being pregnant I've recently been reminded of the dire need to have Ginger coursing through my veins at all times. Luckily my family has always had a fresh ginger root on hand at all times. When I was little my mom and dad would give me ginger ale for tummy aches and nausea. Hell, even with BABIES no matter how young if you throw a little ginger tea into a bottle or their food say goodbye to most colic symptoms, fussiness, constipation, diarrhea, throwing up, and crankiness from tummy aches (Which is you have kids you know SUPER sucks more than anything in the world.) Ginger saved my life from a toddler well into my own children being toddlers. When I'm old you can bet your buck my husband and I will be doing that as the ultimate sign that we want to ease each others pain.

      Well into adulthood its just common place to make someone ginger tea if they are feeling any sort of internal pains, but I realized recently that not everyone know of this amazing trick.

      So if you read all of that you must be like "HELL YEAH, WOOO HIGH FIVES FOR GINGER..." or you're like, "Do I need to Google this? what is this amazing fuss all about?"


      Sets start at the beginning. Since the beginning of human culture societies have been using it to aid in digestion. Religious people out there will be happy to know that Mary was having Jesus Christ sip up some ginger tea when his tummy hurt. Egyptians, Greeks, Romans, Ancient India, China, Russia, and ancient every culture ever have been using it this way.

      SO Now to SCIENCE. Ginger has chemicals in it that reduce inflammation, relax intestinal lining, Ginger's root contains chemicals called gingerols and shogaols. (Thats right, its so awesome they named the acting chemicals after the plant itself.) These things do all of the awesome things I've already told you about! It helps everyone from Chemo-Radiation Patients to New borns with colic. SO when you get pregnant make sure its on you at all time. Not a joke, its a great emergency maker-better!


      SO what can we do to make our lives easier with this ginger stuff? did you know even if you hate the taste of the stuff you can reap the benefits? you dont even have to ingest it. Those beautiful little chemical buddies that have just become your best friends can just be put ON the skin. BOOM. Mind blown?
      The est way to do this is with Ginger oil. We make it all of the time since we have babies in the house.

      Ginger Tea
      You really just grate up some ginger, put it in a loose tea holder, then put it in oiling water.

      Ginger Oil
      Take some ginger root, cut or grate it up into small pieces. For pretty potent stuff put the ginger in some oil (any oil of your choice. I use Olive) so that it is covered in a crock pot and cook as low as possible for about 24 hours, making sure not to let it boil. After its cool store it at rom temp, preferably in a dark glass receptacle. It lasts longer that way.

      Ginger Candy
      Like CANDY a lot? Make your medicine into candy. Im absolutely in love with Alton Brown, so go HERE to check out his PERFECTO recipe.

      (left) Candy and (right) Syrup for Ginger ale


      Ginger Ale
      Ingredients: 2 cups (about 10 ounces) coarsely chopped, peeled fresh ginger 3 strips lemon peel (about 4 inches each), yellow part only 1-1/2 cups (about) sugar 3 quarts chilled club soda Ice cubes

      Preparation: Place ginger, lemon peel, and 4 cups of water in a 4-quart saucepan. Bring to a boil over high heat. Simmer at a low boil, uncovered, for about 10 minutes. Add sugar, stirring constantly, and continue to boil until reduced to about 3 cups, another 15 minutes.

      Place a fine wire strainer over a large bowl. Pour in ginger mixture to separate solids from liquid. Discard the lemon peel. The strained cooked  pieces may be reserved for other uses (good with vanilla ice cream or yogurt), if desired.

      Cool the syrup, pour into a glass container, seal tightly, and chill at least 1 hour until cold or up to 1 week.

      For each 16-ounce serving, mix 1/4 cup ginger syrup with 1 cup cold club soda and pour over ice. Additional ginger syrup and/or sugar may be added to taste.

      Yield: about 4 quarts, 12 servings


      Voila! You really don't need a lot. A tiny bit goes a long long way!


      Tell us your Ginger success stories in the comments, and don't forget to follow us!


      Monday, September 2, 2013

      Poisoning your body from the outside

      Think of your skin as 1,000,000,000 tiny mouths. It absorbs everything you put on it. Just as the food that we eat nourishes us so does the food our skin eats. Actually, 1 of the best ways to feed our bodies your skin. it is your largest organ. 
      Unfortunately, most of the things that we put on our skin is actually poisoning us, and most of the things that are sold to us aren't for our best interest.
      Take baby oil for instance. baby oil is actually made out of mineral oil which is a byproduct from the process of making gasoline. Essentially, they had a lot of extra things left over and decided to try and make money off of it by having you put it on your skin - or in this case your newborn baby. It is extremely toxic!! even the FDA has labeled it as a toxic substance.
      -Or margarine. Margarine was created to keep flies off of things, but they discover they could beat it to people and make extra profit. margarine does not mold and flies will not go near it try leaving some margarine out.. its not consumable!! it's on the FDA's list of suspected carcinogens, and may also use the term "paraffin." (I know margarine isn't thought of as something you put in your skin, but it can go by many different names and be used in a lot of the cosmetics you use. Things they put in food and things they want you to put on your skin are interchanged often.. only the same chemical is given a different name.)

      You should never put anything in your body or on your skin unless you recognize every word in the ingredients. before I go any further I must also comments on "natural flavors." If they were natural why wouldn't they list them? This is just a way for manufacturers to get around listing things they don't want you to know about. don't ever buy anything with natural flavors especially especially if you're a vegetarian. they are usually made from insect or animal by products.

      Here's a list of some popular ones to avoid!
      • Strawberry, Vanilla, and Raspberry flavoring/scent: Made from Castoreum. (the yellowish secretion of the castor sac which is, in combination with the beaver's urine, used during scent marking of territory. Both male and female beavers possess a pair of castor sacs and a pair of anal glands located in two cavities under the skin between the pelvis and the base of the tail.)
      • Red dye is made from Carmine is a red food-coloring that comes from boiled cochineal bugs, which are a type of beetle. 
      • If something has the word fragrance listed this can indicate the presence of up to 4000 different unlisted ingredients.
      • Phenols- A caustic, poisonous, white crystalline compound, Derived from benzene and used in resins, plastics, and pharmaceuticals and in dilute form as a disinfectant and antiseptic. Also calle carbolic acid
      • Peg-8 or polyethylene glycol - Tested heavily in animal. Can destroy renal glands In dogs, after they "sacrifice" them they found that dogs treated with this had cloudy, swollen, and disrupted kidneys.
      • Polysorbate - not only is this used as an emulsifier in cosmetics, a mixing agent in food (like ice cream), but its used in vaccines as a stabalizer. According to the MSDS sheet at Science lab.com, section 11: Toxicological Information, it was tested for inhalation and ingestion and was shown to be slightly hazardous on skin contact, ingestion and inhalation. however these are minor compared to other potential side effects of it's use especially in an intravenous or immunologic setting. In the same section of toxicological information it states that it may cause reproductive effects, it may cause cancer, and may be a mutagenic, (change the genetics
      • Detergents - inscreases skins PH balance and irritates the "acid mantle" of your skin. This allows for bacteria to enter the body
      • Chemical dyes - There are so many, made from so much that its hard to pin down exactly what its doing to your body, but see above for RED DYE as a vague example.
      • Surfactants - a type of detergent (see above) usually made from petroleum or synthetic polymers (2 words for POISON).  Foaming agents, emulsifiers, and dispersants are surfactants which suspend respectively, a gas, an immiscible liquid, or a solid in water or some other liquid.
      • Preservatives - A wide range of things that over time can break down cell walls and literally turn arteries into plastic over a long period of time.
      • Sodium laurel sulfate - anything that suds up most likely has this. It strips all good and bad oils from.the skin allowing bacteria (and acne) to get worse. It is used in animal testing to PROMOTE inflammation.
      • Carbon monoxide is injected into plastic wrap after all the air is sucked out to block the process of oxidation that can turn pink meat brown. 
      • Ammonia is a strong smelling chemical found in household cleaning products, but it’s also used as gas to kill germs in low-grade fatty beef trimmings.

      Thursday, August 8, 2013

      Simple fat flush I do reguarly. Its delicious

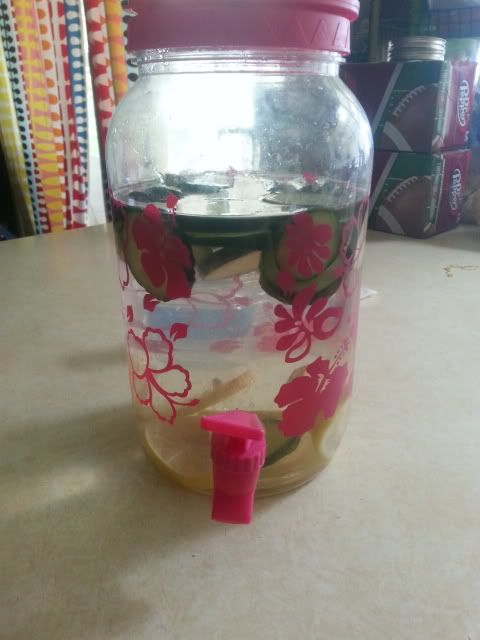
      Fat Flush and Detox water!

      So simple! Even if you arent trying to flush fat or just toxins, or maybe you are pregnant... this is always a good source of vitamins and it just so HAPPENS that it cleans you out and helps your body function!

      Youll Need:
      1 bunch of mint
      1 Lemon/Lime
      1/2-1 cucumber
      Water

      Slice them all and divide the ingredients between drinking receptacles such as bottles or a large pitcher. Let it sit overnight, but then do your best to finish it throughout the day. Leaving it for 2 nights or more can allow bacteria to grow and then you'll be making negative progress!


      Not only does this taste delicious and help flush fat, but it also counts toward your daily water intake!

      Lemons: Help in the absorption of sugars and calcium and cuts down your cravings for sweets.
      Limes: promote a healthy digestive tract.

      Cucumbers act as a diuretic and flush fat cells. It is alkalizing to the body (if you have an alkaline body, no diseases can live there), and increase your energy levels.

      Mint is a natural appetite suppressant that also aids in digestion.

      You can add things if you want to help it taste good like strawberries or peaches... but if you add these be especially dilligent to dump anything you dont drink by the end of the day! Sugars grow bacteria FAST.

      Monday, March 25, 2013

      Alton Browns Homemade Energy, Protein, and puffed rice Bars!

      Sorry for the lack of posts lately, Ive been VERY busy getting ready to graduate at SWIHA! 

      Those extremely expensive bars that you buy for a quick and filling nutrient party are SOOOO bad for you!

      Luckily for you, Alton Brown (from good eats) just taught me how to make a cheap, delicious, healthy version without the evil and FOR the lover of Green Eats!

      Ingredients

      4 ounces soy protein powder, approximately 1 cup
      2 1/4 ounces oat bran, approximately 1/2 cup
      2 3/4 ounces whole-wheat flour, approximately 1/2 cup
      3/4-ounce wheat germ, approximately 1/4 cup
      1/2 teaspoon kosher salt
      3 ounces raisins, approximately 1/2 cup
      2 1/2 ounces dried cherries, approximately 1/2 cup
      3 ounces dried blueberries, approximately 1/2 cup
      2 1/2 ounces dried apricots, approximately 1/2 cup
      1 (12.3-ounce) package soft silken tofu
      1/2 cup unfiltered apple juice
      4 ounces dark brown sugar, approximately 1/2 cup packed
      2 large whole eggs, beaten
      2/3 cup natural peanut butter
      Canola oil, for pan

      Directions

      Line the bottom of a 13 by 9-inch glass baking dish with parchment paper and lightly coat with canola oil. Set aside. Preheat the oven to 350 degrees F.

      In a large mixing bowl, combine the protein powder, oat bran, wheat flour, wheat germ, and salt. Set aside.

      Coarsely chop the raisins, dried cherries, blueberries and apricots and place in a small bowl and set aside.

      In a third mixing bowl, whisk the tofu until smooth. Add the apple juice, brown sugar, eggs, and peanut butter, 1 at a time, and whisk to combine after each addition. Add this to the protein powder mixture and stir well to combine. Fold in the dried fruit. Spread evenly in the prepared baking dish and bake in the oven for 35 minutes or until the internal temperature reaches 205 degrees F. Remove from the oven and cool completely before cutting into squares. Cut into squares and store in an airtight container for up to a week.

      SERVES 24

      Calories: 167

      Total Fat: 5 grams

      Saturated Fat: 1 grams

      Protein: 8 grams

      Total carbohydrates: 23 grams

      Sugar: 14 grams

      Fiber: 3 grams

      Cholesterol: 18 milligrams

      Sodium: 79 milligrams
      Check it out at the Food Network website as well:: http://www.foodnetwork.com/recipes/alton-brown/protein-bars-recipe/index.html?oc=linkback

      Wednesday, March 6, 2013

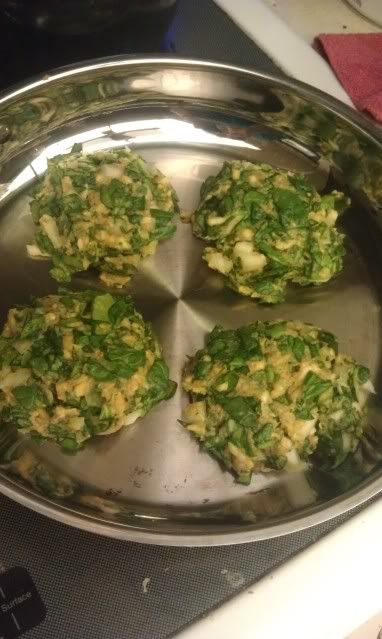
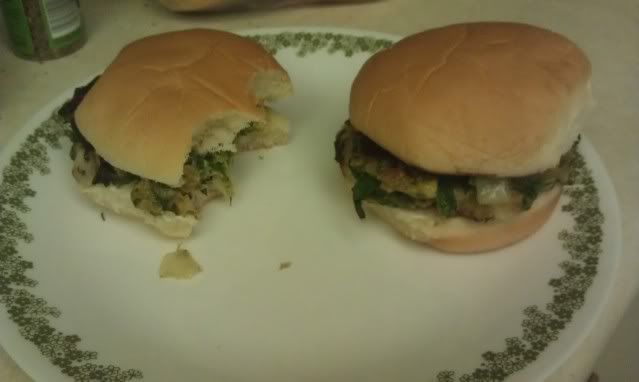
      Spinach burgers!

      These are my new signature dish! I found the original recipe here, but it really wasn't enough for me, and something needed to be changed (don't be mistaken, they are DELICIOUS, I just added personal flair and used FRESH ingredients) so I had to change it around quite a bit.

      Here's what you'll need in order to impress everyone you know, for REAL! Prepare to be amazed because you really cant ruin these and they are the ultimate food if everyone in the house likes different flavors or someone has strong desire to be an individual or a rebel. ;)
      Ingredients:
      • about 1/2lb of fresh spinach, but if you have a family or group of more than 3 people you'll wanna use a full pound and everyone should get 2 burgers (and maybe more depending on how big you make them)
      • 3 eggs
      • half to a full onion, depending on if anyone in your family loves or hates onion.
      • 1/2 c shredded cheese (of course you can add more cheese if you'd like!)
      • 1/2 c bread crumbs
      • 2 tsp Chili powder (or red pepper flakes, or whatever kick you want these to have)
      • 1 tsp salt
      • 2 tsp garlic powder
      • Bread to put them on, or tortilla/pita if you want a wrap, or just plain bread!
      • Condiments - ANY THAT YOU CHOOSE. We had a whole buffet set up with things like Enchilada sauce, dining mustard, BBQ sauce, mayo, ketchup, various salad dressing, etc - these burgers are AMAZING with anything, and everyone can have funzies trying many different combos! (I just as I typed that realized how delicious feta cheese would be on these....)
      So here's what we do...:
      • Chop up the Spinach , doesn't have to be really small - just enough so it mixes and meshes well!
      • Mix it all together in a bowl.
      • Put some oil (of your choice) in a large pan to cook these babies up in.
      • Here's the messiest part - if you have children make sure someone is watching them cause youll have your hands literally full for a few minutes - Make them into patties with your hands and throw them in the pan. You wont get them all in at once, so make the next batch wait their turn!
      • Cook on med-high heat for about 5 minutes, or until they are turning golden and seem to be holding together a little better and flip them - they wont be perfect so don't worry too much, it will all come together when they hit that bun!


      When both sides are done throw your new favorite food on a bun or whatever you chose, decide if you also want tomato on your "burger" then let everyone come dress it themselves. Then just relax and enjoy everyone's "ooh's," "ahhh's" and "oh my god this is the best thing I've ever put in my mouth" that echo through your home!

      The baby even chomped down and ate a burger of his own, and he HATES GREEN FOOD!


      Friday, February 15, 2013

      Delcious vegetarian sandwich!

      I just made the bestest sandwich in the world and I HAD to share it! I made Pesto (Handful of basil from my plant Ive been growing, 2-3 cloves of garlic, Parmesan Cheese, and Olive Oil blended in a food processor) and had to put something on it!


      Here's so nutritional facts of the Pesto:
      • Basil: An excellent source of vitamin K (which helps with blood clotting) and a very good source of iron, calcium and vitamin A (very important in a large number of bodily functions!) In addition, basil is a good source of dietary fiber, manganese, magnesium, vitamin C and potassium.Its a powerful antioxidant, amazing for your heart and protecting arterial walls, has huge anti-inflammatory effects on the body, and is a great anti-bacterial. This is a powerhouse plant and is a sure-fire way to avoid cancer, skin diseases, and it tastes amazing!
      • Parmesan Cheese: One of the lowest calorie and cholesterol cheeses, as well as the lowest in lactose. Its a great source of protein and calcium. Containing more protein than lean beef, Parmesan digests in about 45 minutes compared to a 4-hour digestion time for red meat. Other benefits to the digestion include Parmesan’s ability to promote the development of Bacillus Bifidus, making digestion easier on your system!It also gives your body Magnesium,  Phosphorus, Zinc, and Copper!
      • Garlic: Is is probably my favorite amazing plant. I'm probably going to have to write an entire article on garlic, since it really would be a VERY long explanation. Ill update this when I get around to it =)
      • Olive Oil: protects your body from heart attack and stroke, reduces inflammation, helps with insulin sensitivity in the body, heals arthritis (scientists still aren't sure why yet!) and osteoporosis, and helps keep your heart very healthy! Olive oil is rich in antioxidants, especially vitamin E, long thought to minimize cancer risk. Among plant oils, olive oil is the highest in monounsaturated fat, which doesn’t oxidize in the body, and it’s low in polyunsaturated fat, the kind that does oxidize.

      Then I took bread, put some butter on it, and a little Parmesan cheese, and grilled the bread for a few seconds, melting the cheese to it. On The sandwich I Put:
      Tomato: In-take of tomatoes has long been linked to heart health. Fresh tomatoes and tomato extracts have been shown to help lower total cholesterol, LDL cholesterol, and triglycerides. In addition, tomato extracts have been shown to help prevent unwanted clumping together (aggregation) of platelet cells in the blood. Vitamins A, C, B6 And K are going to be your biggest benefits from the wonderful red things! Tomatoes are naturally low in sodium, saturated fat, cholesterol, and calories. Tomatoes also provide thiamin, niacin, magnesium, phosphorus and copper, all of which are necessary for good health.They also help reduce inflammation, make cancer shake in its boots, and make everything taste awesome....
      Spinach: You name in, spinach does it! One cup of spinach has nearly 20% of the RDA of dietary fiber! Its anti-inflammatory, anti-cancer, helps with vision, reduces blood pressure, one cup of boiled spinach provides over 1000% of the RDA of vitamin K that can prevent excess activation of osteoclasts (the cells that break down bones), as well as promote the synthesis of osteocalcin, the protein that is essential for maintaining the strength and density of our bones. The abundance of vitamin K in spinach contributes greatly to a healthy nervous system and brain function by providing an essential part for the synthesis of sphingolipids, the crucial fat that makes up the Myelin sheath around our nerves.
      Cucumber: This is such a refreshing plant! It hydrates you with water and electrolytes (So its a great hangover cure), has tons of b Vitamins (great for energy and also a hangover cure) reduces inflammation, fights cancer, promotes joint health, helps with weight loss and digestion, and relieves arthritis pain!
      vitamins A, B & C and the presence of certain minerals like magnesium, potassium, and silica make cucumbers an essential part of skin care.
      Grilled Eggplant: Fiber, almost no fat, less cancer, better skin, and weight loss? SIGN ME UP! Eggplant is an amazing plant.

      I put a piece of cheese (any cheese will do, I used Colby Jack) on each slice of bread (both outsides of the sandwich) with some of the pesto in the middle of it and grilled it all together for a few minutes.

      SO DELICIOUS! It took only a few minutes to make, and as you can see from the picture it was so delicious I had to take the picture with multiple bites taken out! Haha!

      Thursday, January 10, 2013

      Vegan Bufflo "Wings" (Cauliflower)

      Uploaded from the Photobucket Android App
      A friend of mine (And irregular author of this blog, Tiffany) posted that her boyfriend made her Cauliflower wings, on Facebook. This idea was so awesome to me that I did some research.

      I found the following recipe at Daydream Kitchen:

      Ingredients

      • 1 head cauliflower 
      Batter:
      • Dash of Frank’s Original Hot Sauce, or whatever kind you like
      • ½ c. white rice flour
      • ½ c. water
      • Pinch salt
      For the Buffalo sauce:

      • ¼ c. Frank’s Hot Sauce
      • ¼ c. oil, canola oil works best
      • Pinch salt

      Instructions

      1. Preheat oven to 450 degrees. Mix together the batter ingredients in a small bowl. Dip the cauliflower in the batter until coated evenly then place on greased baking sheet. Bake for about 15 minutes or until the batter hardens.
      2. Mix together sauce ingredients in a small bowl. Once the cauliflower are done baking, brush them with the hot sauce mixture and bake again for a few more minutes, until cauliflower is crispy.
      3. Remove from oven. You may want to add a bit more buffalo sauce to taste.


       Now Im not really that into spicy, so I touched it up a bit...

      The initial batter that you coat the cauliflower in is similar to the above recipe in mine, only I put some cayenne powder, Paprika, and chili powder in it as well to really get that flavor into the cauliflower. Also, I used 1 whole cup of both unbleached flower and water. I had a big head of cauliflower! And I used Olive Oil instead of Canola oil... I dont know why exactly but Canola oil just doesnt feel healthy when it goes into my body like Olive Oil does!
      I didnt have "Frank's" Hot sauce, but I did have tapatio... 
      And I only added a few drops. Instead I made the sauce out of a little water, BBQ sauce (a couple of different kinds I had in my fridge,) More garlic powder, and a little butter.

      You may need to leave it in the oven even longer, until crispy!

      Add some ranch or bleu cheese for dipping and a side of celery and my day was much better!

      In the end the taste was AWESOME. I love it, but I do suggest doing a second or third layer of the sauce before taking it out of the oven. I could use some more bbq flavor, but not to knock it at all! It is delicious and great for toddler finger food with an added bonus of being super healthy and vegan!

      And this is an awesome new way for me to get veggies into my 2 year old!


      Sunday, October 28, 2012

      Dragon cake!

      I did it again! Amazing cake! Refer to Here On how to make it!


      Just an FYI, when I made this one it cooked a little more brown than usual on the top simply because I double the recipe for more cake, and it had to cook longer.

      Tuesday, October 23, 2012

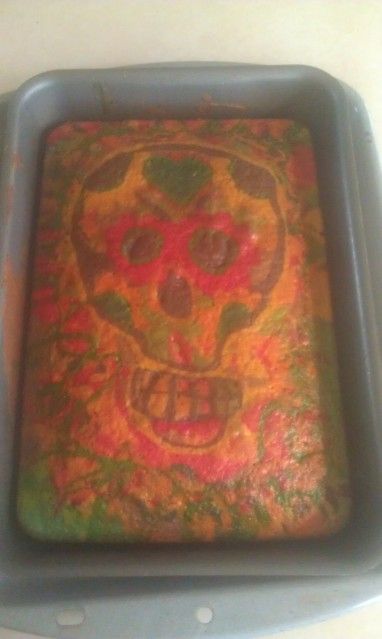
      Dia De Los Muertos! CAKE AWESOME

      I threw an awesome Dia De Los Muertos party the other day!


      I got some rave reviews about the cake I made for it (And it was so delicious it didnt even require frosting! There were barely crumbs left toward he end of the night!) so I decided Id show you guys how its done!

      Uploaded from the Photobucket Android App

       
      This is the first time Ive ever actually drawn into cake with the cakes own batter.

       Im not going to go into the actually cake process because you have a lot of choices here - Either make your own favorite WHITE CAKE recipe or buy a boxed one. Make sure you know how much the recipe makes so that you know the right size of the pan!

      *Just a side note* I was actually short an egg for the recipe, but never fear! Half of a banana and 1/4Tsp of baking powder can be substituted! I LOVE CHEMISTRY!

      You'll also need:
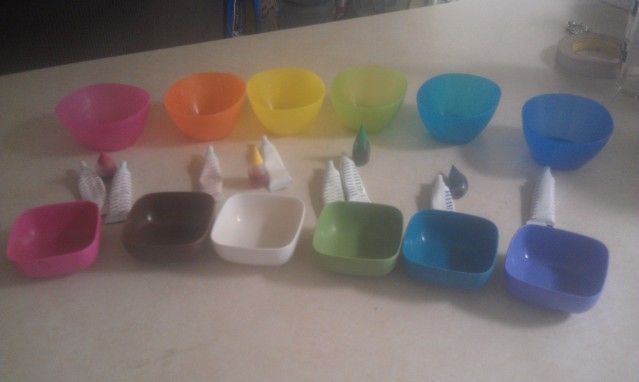
      • 6 bowls (one for each color)
      • 6 spoons (So each color can be mixed separately)
      • Food coloring (I combine NEON colors with the regular ones, or you can just buy a basic pack and combine colors to make Orange and purple.) Here's a kit you can buy online with a LOT of colors, if you wanna get really serious!


      • A cake decorating kit. There are the bag ones or the plastic ones: Mine was the syringe type. a bag seems like it would be way too hard to switch back and forth between colors.


      Uploaded from the Photobucket Android App


      Line up your bowls and dyes! Mine happen to be rainbow Ikea bowls (I ended up not using the small square bowls) so I color coordinate.
      Make the cake batter, divide it evenly between the bowls, and then add the food coloring to each. Mix em up! Dont make them too dark, we are going to darken them later!

      Uploaded from the Photobucket Android App 


      Here's the fun part! Drizzle the colors either randomly like I did - I pretended the cake was an 80's party coming to life - Or in some pattern if you prefer. Alternate between colors and it builds up. DON'T USE ALL OF THE BATTER YET. (The hard part is knowing how much batter you're going to need at the end - decide how much of each color you may need for your planned design in the end and reserve that amount of that color) I reserved probably about 1/4th of each color simply because I had NEVER done this before and have never heard of it being done so I had no idea where my right-brained random creative ingenious was about to take me!) But you should end up with this, and a little left over:


      Uploaded from the Photobucket Android AppHere's kind of the hard/messy part. Fill up the cake decorator you have with whatever color comes first in your design. Mine was purple for the outline of the skull, eyes, nose, teeth, etc. I did one color at a time and tried to do EVERYTHING in my picture that needed to be that color so I didn't waste cake or have to refill the syringe later with that color again. As you can see here There are extra squiggle lines around the skull - this is what I did with the batter that was left over after I knew I had done everything I could in my picture with that color.


      After that bake it according to your recipe instructions!

      There it is! My famous cake! A beautiful lady at this party actually called me "The Michelangelo of cakes!" What an amazing compliment! I'm pretty sure fireworks came out of my ears when she said it.

      If you make this recipe (no matter what your design is) Please send me a picture! Id LOVE to see your creativity!


      Uploaded from the Photobucket Android App

      Sunday, September 2, 2012

      Root Beer Float cookies.

      I just made the most amazing cookies. Everyone in my house is loving them!


      Here's The recipe!
      Makes about 3 dozen cookies, depending on the size


      Cookie Ingredients:

      1 cup butter, softened
      2 cups packed brown sugar
      2 eggs
      1 cup buttermilk (I actually made buttermilk using 1 teaspoon of vinegar and a cup of almond milk)
      1 tsp. root beer extract or concentrate
      4 cups flour
      1 tsp. baking soda
      1 tsp. salt
      Frosting Ingredients:
      4 cups powdered sugar (or icing sugar)
      3/4 cup butter, softened (I actually ran out of butter so I used some olive oil and added a bit of flour to thicken it up)
      3 Tbsp. milk (I used almond milk)
      1 tsp. root beer extract or concentrate
       
      Directions:
      Preheat oven to 375º.
      In a mixing bowl, cream butter and brown sugar. Add eggs, one at a time, beating well after each addition. Beat in buttermilk and root beer extract. 
      Combine dry ingredients; gradually add to creamed mixture. 
      Drop by globs onto ungreased baking sheets. (They will be super gooey) Bake at 375º for 10-12 minutes or until lightly browned. Remove to wire racks to cool. 
      In a mixing bowl, combine all frosting ingredients. Beat until smooth. 
      Frost cooled cookies. The Frosting makes the cookies!

      Monday, July 23, 2012

      Mexican Chicken Stuffed Shells


      bakedpastashells

      The boyfriend and I made this the other night and it was delectable. I found the recipe on Pinterest. If you want something quick and fun to make (even more fun with a friend or significant other)  that makes a LOT, Than try this amazing recipe out!

      I found the recipe here: http://busy-at-home.com/blog/mexican-chicken-stuffed-shells-my-secret-recipe-club-entry-for-june/

      Ingredients
      • 4 cups chicken breast, cooked and chopped
      • 1 can black beans, rinsed and drained
      • 6 green onions, diced
      • 1/2 each of red, green, yellow, & orange bell peppers (or 2 whole bell peppers of your choice), diced
      • 3 (8 oz.) blocks cream cheese, softened (not melted)
      • 2 cans diced tomatoes with chiles (don’t drain) (Rotel or store brand, either works)
      • 1/4 - 1/2 cup chicken stock
      • 1 tsp cumin
      • 1 1/2 cups sharp cheddar cheese, shredded
      • 1 cup of picante sauce
      • 38 large pasta shells, cooked al dente

      Instructions
      1. Cook pasta shells in well salted, boiling water until al dente (still have a little bite to them) If you cook them too long, they will be difficult to stuff, plus they will have additional cooking time, once they are stuffed. Drain the pasta and set aside while you make the filling.
      2. Cook, drain and dice enough chicken breast to make 4 cups. I always have homemade chicken stock and pre-cooked diced chicken bagged in my freezer. You could use canned chicken broth if you prefer.
      3. To make the filling, mix diced chicken, drained black beans, green onions, diced peppers, and cumin in a large mixing bowl. Thoroughly incorporate all the ingredients.
      4. In a separate bowl, mix the cream cheese, chicken stock and undrained tomatoes with chiles. When thoroughly combined, pour it over the chicken mixture and mix well. (If you have trouble incorporating the cream cheese and tomatoes, you can heat it slightly in the microwave.)
      5. Spread 3/4 c. picante sauce in the bottom of a large baking pan. (I used 13x18x2, but I’m guessing that two 9×13′s would also work.) Reserve the final 1/4 cup, for later.
      6. Using a spoon, or your fingers, fill each of your cooked and cooled pasta shells, setting them into the picante covered pan. Continue until all shells are filled and arranged in the pan.
      7. When the pan is full, drizzle the shells with the remaining 1/4 cup of picante and then sprinkle with the shredded cheddar cheese.
      8. Cover the baking pan tightly with foil and bake at 350 degrees for about 30 minutes or until hot and bubbly.

      Wednesday, July 18, 2012

      Dont waste those coffee grounds!

      I try to recycle or reuse anything that comes into my home, one thing that usually bothers me and that is a huge waste in most households is Coffee grounds!


      Here are a few ways you can use coffee grounds after youve drank up that coffee. Better than throwing things in the garbage, these ways might actually make your life easier!

      1. Skip the toxic abrasive cleaners for pots and pans and use a handful of coffee grounds instead.

      2. Scour (non-porcelain) sinks with coffee grounds. It can actually clean out your pipes with its course texture and inhibits odors.

      3. Clean old food off of dishes. Be aware not to use coffee grounds on materials that might be absorbent or porous so that you don’t end up with brown stains.

      4. Boiling water and coffee grounds help to get rid of stinky odors deep down in your drains!

      5. Out of Baking soda? (you should NEVER be!!!) Coffee grounds can also be used as a deodorizer. Place grounds in a jar or dish to absorb odors from refrigerators and freezers.

      6. Leave a dish of coffee grounds out to absorb odors in rooms that have an unpleasant odor. (the same goes for your car and your ashtrays!)

      7. Make a used coffee grounds sachet. Fill old nylons or cheescloth with dry used coffee grounds. Hang in closets to absorb odors.


      8. After you give your dog a bath, rub coffee grounds through the coat of your pet. Coffee grounds are said to repel fleas.

      9. Rub on hands to remove food prep odors.
      10. Use wet grounds when cleaning your fire place or wood stove to keep the dust and ash from flying.

      11. Get rid of Ants! Use coffee grounds for natural ant control. Place dried grounds in the areas ants frequent. The smell is a deterrent.

      12.  Grow mushrooms on old coffee grounds.

      13. Cover up scratches in furniture. Dab a strong solution of coffee onto the scratch. Naturally, this works best on darker woods.

      14. Use coffee grounds as a non-toxic, fully degradable fertilizer. Coffee grounds are a good source of nitrogen, calcium, magnesium, potassium and other trace minerals. While you need to be aware that not all plants love coffee, such as tomatoes, most are enriched by the added nutrients. Be careful though - make sure you check the internet or some other source to make sure that where you live doesnt have naturally acidic soil - I live in Arizona where the ground is Naturally Alkaline, and Coffee REALLY peps up soil for plants!) This is especially helpful for plants such as roses that need a high adicidy.

      15. Your worms love coffee as much as we do. Theory suggests that besides the caffeine, the bacterium that grows on the many-sided grounds is not only a food source, but adds grit to their digestive system allowing them to digest better. Coffee-eating worms reproduce faster, which is great for oxygenating our gardens and compost.

      16. Use as a non-toxic bug repellant. Use a solution of coffee to spray your plants. The smell is too strong for most bugs.

      17. Use coffee grounds to keep cats from digging and pooping in your garden.

      18. Use coffee grounds to deter slugs and snails. Both the smell and the abrasive surface help keep these pests out of the garden.

      19. To increase your carrot harvest, mix the seeds with fresh-ground coffee before sowing. Not only does the extra bulk make the tiny seeds easier to sow, but the coffee aroma may repel root maggots and other pests. As an added bonus, the grounds will help add nutrients to the soil as they decompose around the plants.

      20. Kitty repellent. To keep kitty from using the garden as her personal powder room, sprinkle grounds mixed with orange peels around your plants.

      21Soften and add shine to hair. When washing your hair, rub coffee grounds through wet hair and rinse. For brown hair, coffee grounds add highlights.

      22. Use coffee grounds as an exfoliate for skin. Pat on skin, massage over skin, rinse.

      23. Add coffee grounds to your skin mask beauty routine. Put some wet grounds over dark circles around your eyes and watch that Vassal Constricting elixir erase them!

      24. Used grounds are also said to repel snails and slugs.

      25. Rub coffee grounds on hands to get rid of smells from chopping or cutting up pungent foods.
      26. Make a used coffee grounds sachet. Fill old nylons or cheescloth with dry used coffee grounds. Hang in closets to absorb odors.
      27. When you need an abrasive cleaner, coffee grounds can be used. Be careful of any surfaces that might stain.
      28. Remove furniture scratches with wet coffee grounds.
      29. Sprinkle wet coffee grounds over the ashes to keep from becoming engulfed in the plume of dust ashes create when you need to remove them.
      30. Dye fabric, paper or Easter eggs. Simply add used coffee grounds to warm water and let sit a bit to create a dye. 


      31. Cellulite reducer. Miix 1/4 cup warm, used coffee grounds with 1 tablespoon of then, while standing over an old towel or newspaper, we're to apply the mixture to our "problem areas". Then wrap the areas with shrink wrap and leave on for several minutes. Unwind the wrap, brush loose grounds off our skin and then shower with warm water. For best results, it is recommended to repeat this procedure twice a week. A little weird to be sure, but as high priced cellulite creams actually have coffee in them, it just might work.

      32. The acid in coffee actually melts ice a lot like salt.

      33. Use it in ashtrays. It keeps the odor of cigs out and puts them out for ya like the sand in public ashtrays!

      Wednesday, February 15, 2012

      You dont need potatoes to make fries!

      There are a lot of uses for potatoes, but for those of you on diets, looking for a changeor just looking for healthier options in general.

      Take this simple recipe and use any of the following veggies for a fun new twist on kids favorite appetizer or snack!

      You Can you Turnips, Jimica, Eggplant, Yams, Butternut squash (or any squash for that matter), sweet potato, or zucchini!

      Cut up the veggie into strips (like fries) then toss the strips in olive oil.
      Preheat the oven to 450.
      Then make a season shake. I use things like Bread crumbs, garlic salt, Parmesan cheese, and paprika. Use whatever you think would be fun on fries! Toss the veggies in the shake you mixed up. After they are coated put them on a baking sheet and put them in the oven for about 15-30 minutes depending on the veggies. Check on them every 15 minutes until they are the texture you prefer.

      VOILA! Yummy time!

      Monday, February 6, 2012

      Fat is good for you: What America has lied to you about.

      Our society and that television in your home are constantly telling you what to eat, where, and do. It tells you what you want and what you should want. You can never have enough stuff!

      Except fat...

      We are reaching another critical change int he way we think... and EAT! Thanks to science we are constantly out-dating information. The Earth used to be flat remember.
      FAT IS GOOD! Just not bad fat! Its a misconception that you want to have no fat in your diet in order to keep fat off of your body. Remember that last post about coconut oil? Its AMAZING for weight loss, but very heavy in saturated fats. Up until recently fat was just evil. Even more recently we have decided that even SATURATED fats aren't that bad!

      If done right youll feel less guilty about fat content and more mindful or what you actually eat, regardless of stats on the packaging. (To be fair if its packaged you may not wanna eat it in the first place, haha)

      Fat slows down nutrient absorption so you can go longer without feeling hungry. Its "bad" carbs, preservatives, and processed sugars that will actually make you gain weight. Fat also helps your body process vitamins! If you eat a whole meal full or pure vitamins but its completely fat free it will be way harder for your body to even utilize those vitamins at all!

      Lets not forget baby making! I person who is too thin or athletic, as we all should know, is more likely to be infertile that a girl that's got curves (plus males are naturally more attracted to fat - big hips, butt, and chest are almost always the first place a man will look to decide who he wants to mate with.) Having a healthy amount of meat on your bones actually makes you way more likely to conceive, and even makes it ore likely to have multiple births.

      More fat cells aid in immunity boosts, and didn't you learn in school how fat is converted into energy from your body? Having a healthy level or fat and muscle makes it easier to lose weight, and give you the energy to do it!