

I got some rave reviews about the cake I made for it (And it was so delicious it didnt even require frosting! There were barely crumbs left toward he end of the night!) so I decided Id show you guys how its done!
This is the first time Ive ever actually drawn into cake with the cakes own batter.
Im not going to go into the actually cake process because you have a lot of choices here - Either make your own favorite WHITE CAKE recipe or buy a boxed one. Make sure you know how much the recipe makes so that you know the right size of the pan!
*Just a side note* I was actually short an egg for the recipe, but never fear! Half of a banana and 1/4Tsp of baking powder can be substituted! I LOVE CHEMISTRY!
You'll also need:
- 6 bowls (one for each color)
- 6 spoons (So each color can be mixed separately)
- Food coloring (I combine NEON colors with the regular ones, or you can just buy a basic pack and combine colors to make Orange and purple.) Here's a kit you can buy online with a LOT of colors, if you wanna get really serious!

- A cake decorating kit. There are the bag ones or the plastic ones: Mine was the syringe type. a bag seems like it would be way too hard to switch back and forth between colors.
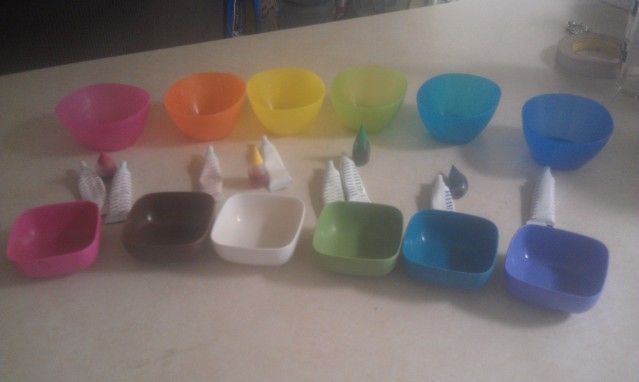
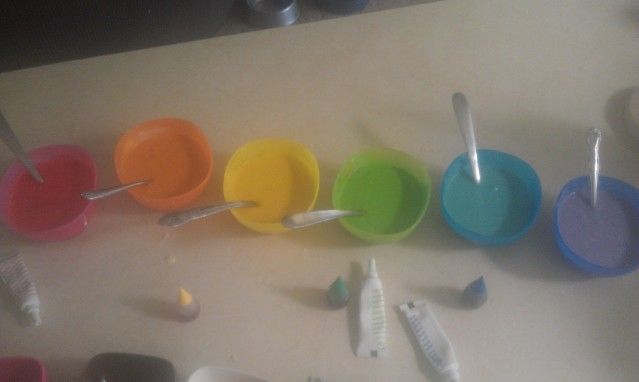
Line up your bowls and dyes! Mine happen to be rainbow Ikea bowls (I ended up not using the small square bowls) so I color coordinate.
Make the cake batter, divide it evenly between the bowls, and then add the food coloring to each. Mix em up! Dont make them too dark, we are going to darken them later!
 Here's the fun part! Drizzle the colors either randomly like I did - I pretended the cake was an 80's party coming to life - Or in some pattern if you prefer. Alternate between colors and it builds up. DON'T USE ALL OF THE BATTER YET. (The hard part is knowing how much batter you're going to need at the end - decide how much of each color you may need for your planned design in the end and reserve that amount of that color) I reserved probably about 1/4th of each color simply because I had NEVER done this before and have never heard of it being done so I had no idea where my right-brained random creative ingenious was about to take me!) But you should end up with this, and a little left over:
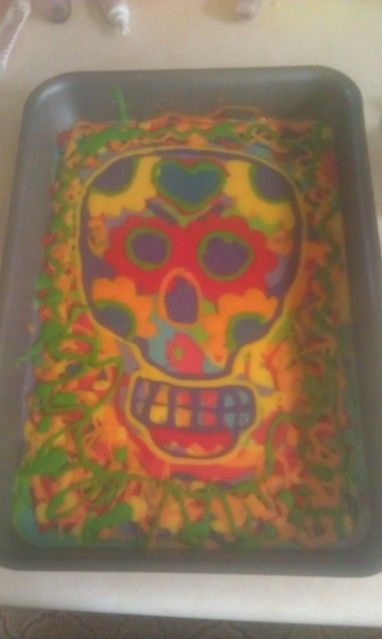 Here's kind of the hard/messy part. Fill up the cake decorator you have with whatever color comes first in your design. Mine was purple for the outline of the skull, eyes, nose, teeth, etc. I did one color at a time and tried to do EVERYTHING in my picture that needed to be that color so I didn't waste cake or have to refill the syringe later with that color again. As you can see here There are extra squiggle lines around the skull - this is what I did with the batter that was left over after I knew I had done everything I could in my picture with that color.
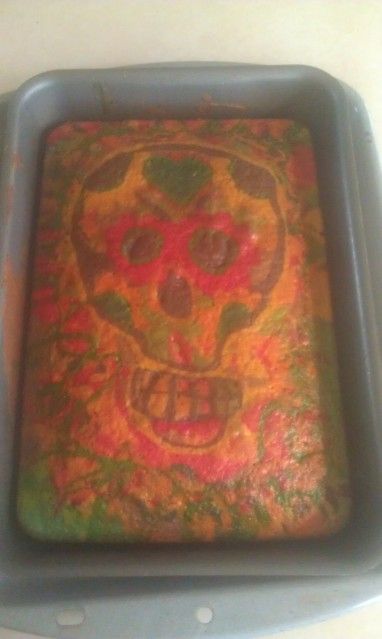
After that bake it according to your recipe instructions!
There it is! My famous cake! A beautiful lady at this party actually called me "The Michelangelo of cakes!" What an amazing compliment! I'm pretty sure fireworks came out of my ears when she said it.
If you make this recipe (no matter what your design is) Please send me a picture! Id LOVE to see your creativity!
No comments:
Post a Comment