Monday, August 4, 2014
Monday, July 28, 2014
Amy: Home Management Makeover

The transition back into the home after working for the last 4 years has been different. For the first few weeks it felt like a vacation. Staying in my sweat pants all day, snuggling my son, spending quality time with my daughter, and enjoying naps during the day. But a vacation can only last so long before the work starts to pile up, and in my case, it really did!
In the months leading up to my son's birth, I had done a lot of reading about home-management and tips for creating and maintaining an organized and healthy household. We're making a lot of changes and are about to make a lot more. Not only is our house getting an overhaul, so is our family. Below is my plan to a healthy family and home, I call it my Home Management Makeover. I put all the info into my Home management binder (Click HERE for Melody's Post on making your own Home Management Binder!)
- Step One: PURGE
- Take the time to go through all the clutter in your home and ditch anything you don't need, don't have room for, or don't need.
- PROTIP: Take all the clothes hanging in your closet and hang the hangers backwards. When you wear a garment, hang it back up facing the correct way. At the end of a year go through and purge anything that's still hanging backwards.
- Step Two: ORGANIZE
- Make sure that everything has it's place. If it doesn't have a place, make one.
- PROTIP: Clear Shoebox containers are only $1.00 at target and make a great container to organize small toys, craft and art supplies, etc.
- Step three: CLEAN
- Getting everything in your home clean. A clean home is a happy home!
- PROTIP: Try a cleaning plan. Clean your house in cycles, aside from the small things that need to be done every day or once a week (dishes, laundry, vacuuming, etc.) things like scrubbing finger prints off the walls, cleaning baseboards, and cleaning ceiling fan blades usually only need to be done in a 2-3 month cycle. Divide your house into 8-12 Zones or sections (e.g. Kitchen, Bathroom, Living room, etc.) chose one zone for each week. For each zone, break down that zone into seven separate areas to do one small area each day (you can also break it down to a smaller number to give yourself days off during the week.
MY CLEANING PLAN
- Zone 1/Week One: Living Room
- Area 1/Monday: Cat's Corner (where we keep our cat-tree, cat beds, and the cats' toys)
- Area 2/Tuesday: Entertainment center
- Area 3/Wednesday: Bookshelf
- Area 4/Thursday: Kari-Lynn's Nook (a space under our stairs where our daughter keeps her toys.)
- Area 5/Friday: Couches/Behind the couch
- Weekend Off
- Zone 2/Week Two: Kitchen
- Area 1/Monday: Cabinets
- Area 2/Tuesday: Drawer
- Area 3/Wednesday: Stove/Oven/Microwave
- Area 4/Thursday: Fridge/freezer
- Area 5/Friday: Sink and counters
- Weekend Off
- Zone 3/Week Three: downstairs Bathroom
- Area 1/Monday: Catbox
- Area 2/Tuesday: Sink
- Area 3/Wednesday: Mirrors
- Area 4/Thursday: Toilet
- Three Day weekend!
- Zone 4/Week Four:Stairs and Upstairs Hallway
- Area 1/Monday: Stairs Landing
- Area 2/Tuesday: Stairwell
- Area 3/Wednesday: Bookshelf in hallway
- Area 4/Thursday: Wall of Fame (we use the walls in our hallway to display Kari-Lynn's Awards, achievements, and artwork along with chore lists, calendars, and family business.)
- Three Day Weekend!
- Zone 5/Week Five: Upstairs Bathroom
- Area 1/Monday: Vanity
- Area 2/Tuesday: Cabinet
- Area 3/Wednesday: Shower/Tub
- Area 4/Thursday: Floors/Walls
- Area 5/Friday: Toilet
- Weekend Off
- Zone 6/Week Six: Kari-Lynn's Room
- Area 1/Monday: Closet/Dresser
- Area 2/Tuesday: Barbie Corner
- Area 3/Wednesday: Under the bed
- Area 4/Thursday: Bookshelf
- Area 5/Friday: desk/behind the door
- Weekend Off
- Zone 7Week Seven: Andrew's Room
- Area 1/Monday: Dresser
- Area 2/Tuesday: Changing Table
- Area 3/Wednesday: Shelf
- Area 4/Thursday: closet
- Three Day Weekend!
- Zone 8/Week Eight: My Room
- Area 1/Monday: Closet
- Area 2/Tuesday: Desk
- Area 3/Wednesday: Nightstand
- Area 4/Thursday: Bed Drawers
- Three Day Weekend
So there you have it, how I manage my happy healthy home. How do you manage your home? Do you keep a home management binder? I'd love to hear your tips on how you run your home!
Check out our other post that Melody made about her Household Management book!
Thursday, July 17, 2014
Sunday, July 13, 2014
Amy and Melody's Newborn Essentials
Ok guys, its my personal honor to introduce to you a new partner in crime on here =) She will be making posts randomly, as I do so look out for her super cool articles.
From time to time we will be making JOINT posts - this being our first. To keep you from getting uber confused in this post any writing from AMY will be BLUE and Any writing from MELODY will be GREEN!
Please keep in mind that this is just our perspective on what works best. we both have done this twice now, with one boy and one girl and trust me - the second one is only SLIGHTLY easier, haha.
Drum roll PLLLLLLEEEASE!
TADA
Hi! I'm Amy, a friend of the owner of the blog. She and I have discussed my writing some guest spots on the blog about my DIY journey and some helpful hints, tips, and tricks of navigating through the mommy life. I have a 7 year old little girl and a 1 month old baby boy and have just committed to staying home full time with my son and caring for my family.

It's been quite some time since I've had to do the newborn thing so I feel like a Newbie at this again! One thing I found incredibly helpful in the weeks before our little guy made his arrival were the blogs and videos about what some new moms considered their essentials. I decided it would be a good idea to compile a list of what I found absolutely essential in these first few weeks along with a few new things that I didn't have or know existed my first time around that have made life just that much easier!


3. Wall Decals or other fun wall decorations. I have discovered that my little guy is far less likely to scream through his whole diaper change if he has something fun to look at. I purchased some wall decals for his room and placed some on the wall behind his changing table to give him something fun to look at. We chose a large black and white pirate flag and some cute little peel and stick pirate decals. He is extremely interested in that pirate flag.
For this I am glad we have decorated ceilings and rainbow fans! My baby LOVES fans, especially the colored ones. Whoever invented mobiles was no fool!

4. Sling/Wrap/Carrier. When my first child was born Baby wearing was the furthest thing from my mind, but in the years since her birth and the years spent trying to conceive, I had done some research on baby wearing. While there are tons of benefits for baby (such as being close to mom, skin-to-skin, etc.) I have to admit, I purchased my sling for purely selfish reasons...I HAD to be able to get stuff done, especially as a mother of two! I opted for a Seven Sling (Click Here for their site) I had received a promo code for a free sling (just pay shipping) so When it arrived I immediately tried it on. My son loved it, and so did I. It really helped me get things done in those early weeks when he was awake every two hours.

5. A Boppy or other nursing pillow. Even if you're not breastfeeding, a nursing pillow is absolutely essential. My little guy is on the "hefty" side. Meaning feedings KILL my shoulders when I hold him. I utilize the boppy in my lap to rest him and my arms on. This makes the whole experience a lot more pleasurable for us both. It's also great to have for propping baby while they spend those few precious hours a day awake so you can engage with them and play.

Well that's my short list of newborn essentials, just a few things that have made life a little bit easier the second time around for me. Please comment below if there is anything you'd like to add to the list, or something you found essential when you had your little one, we can all help a first time mom, or one who is starting all over again can!
Also, are there any items you purchased or received as a gift that you found really useless? When my daughter was born, someone got me a wipes warmer...I don't know how much they paid for it, but a few packages of diapers probably would have been a lot more useful!
Thanks Amy! Now on to my list. I was a little more practical and tedious about my list. I even surveyed some people who were absolutely not helpful haha (The number one answer for an ESSENTIAL when having a new baby was boobs....)
So lets get real. If you are about to have a baby here are the seemingly obvious things to not miss (I wont mention the things about that were mentioned):
Speaking of Breastfeeding...EPing (exclusively pumping)
I wanted so badly to breastfeed my son, but circumstances in the hospital made it near impossible and he wouldn't latch, so I tried to exclusively pump for him. EPing is a LOT of work. You have to pump for an hour at a time every two hours around the clock. If you skip just one session your supply will drop a LOT. The kicker is that the most important session is 2-6am as you tend to produce more milk at that time of day (thanks hormones!) Well I didn't stick to the strict schedule and slowly I dried up. After 4 weeks my sessions were so non-productive that we decided to switch to formula and our stock of pre-pumped breastmilk. But the few things I found helpful...
From time to time we will be making JOINT posts - this being our first. To keep you from getting uber confused in this post any writing from AMY will be BLUE and Any writing from MELODY will be GREEN!
Please keep in mind that this is just our perspective on what works best. we both have done this twice now, with one boy and one girl and trust me - the second one is only SLIGHTLY easier, haha.
Drum roll PLLLLLLEEEASE!
TADA
Hi! I'm Amy, a friend of the owner of the blog. She and I have discussed my writing some guest spots on the blog about my DIY journey and some helpful hints, tips, and tricks of navigating through the mommy life. I have a 7 year old little girl and a 1 month old baby boy and have just committed to staying home full time with my son and caring for my family.
It's been quite some time since I've had to do the newborn thing so I feel like a Newbie at this again! One thing I found incredibly helpful in the weeks before our little guy made his arrival were the blogs and videos about what some new moms considered their essentials. I decided it would be a good idea to compile a list of what I found absolutely essential in these first few weeks along with a few new things that I didn't have or know existed my first time around that have made life just that much easier!
1.) Bath Cozy or Bath Buddy. I had NO idea these even existed until about a week before I went into labor. I was at a baby shower for a member of my family who was due just after me. She opened what I thought was just a cute little animal shaped washcloth until I heard another mom speak up "oh those are GREAT for newborns!" I had to ask. What they told me was that it was a bath cozy. It's basically a cute little washcloth type thing, usually in the shape of an animal. You soak the cozy in the warm bath water and drape it over baby while you're bathing them. It keeps them warm and calm! I immediately HAD to have one and found this cute little monkey with a guitar. This was pretty much amazing. My little guy just LOVES it, and we didn't get any first bath blues like we did when his big sister had her first bath!

I love this Idea! We just use a regular washcloth to lay over her chest, but its always fun to have cute things for your baby. For me this isn't essential but its definitely a nice addition just like those cute little clothes you drape your babe in =)
2.) Bouncer. Pretty sure this is no secret, but bouncers are pretty much amazing. I wouldn't get a lot done without mine, and our little guy sleeps in his most nights because he gets pretty gassy and may have a touch of reflux and keeping him slightly upright while he sleeps is SO helpful! Our bouncer has sounds and vibration like most and also has a cute little mobile (I call it his monkey friends) We rarely use the sounds and vibration anymore though!
This is DEFINITELY an essential. You cant hold your little one 24/7 and a bouncer is the best way to have them at the right angle without being afraid they may fall or squish up when you aren't looking. If you get a nice compact bouncer you can take your baby with you. I ALWAYS had my bouncer on the kitchen counter with me when I cooked and both of my kids stayed happy for a long long time since they not only could see me, but me moving around like a whirling dervish was extremely fun to watch haha.
3. Wall Decals or other fun wall decorations. I have discovered that my little guy is far less likely to scream through his whole diaper change if he has something fun to look at. I purchased some wall decals for his room and placed some on the wall behind his changing table to give him something fun to look at. We chose a large black and white pirate flag and some cute little peel and stick pirate decals. He is extremely interested in that pirate flag.
For this I am glad we have decorated ceilings and rainbow fans! My baby LOVES fans, especially the colored ones. Whoever invented mobiles was no fool!
4. Sling/Wrap/Carrier. When my first child was born Baby wearing was the furthest thing from my mind, but in the years since her birth and the years spent trying to conceive, I had done some research on baby wearing. While there are tons of benefits for baby (such as being close to mom, skin-to-skin, etc.) I have to admit, I purchased my sling for purely selfish reasons...I HAD to be able to get stuff done, especially as a mother of two! I opted for a Seven Sling (Click Here for their site) I had received a promo code for a free sling (just pay shipping) so When it arrived I immediately tried it on. My son loved it, and so did I. It really helped me get things done in those early weeks when he was awake every two hours.

I think every mom will attest to the miracle that is the sling!

I AM breastfeeding and I LOVE it. Can you say HANDS FREE FEEDING? Im a chronic multi-tasker and I think I would die if I was stuck sitting doing nothing for the 16 hours a day Im feeding her. My husband even uses it to prop her up.
Also, are there any items you purchased or received as a gift that you found really useless? When my daughter was born, someone got me a wipes warmer...I don't know how much they paid for it, but a few packages of diapers probably would have been a lot more useful!
Thanks Amy! Now on to my list. I was a little more practical and tedious about my list. I even surveyed some people who were absolutely not helpful haha (The number one answer for an ESSENTIAL when having a new baby was boobs....)
So lets get real. If you are about to have a baby here are the seemingly obvious things to not miss (I wont mention the things about that were mentioned):
- Diapers (If you have a diaper raffle at your baby shower, you could end up having a long long time before you have to buy them! My son is 8 weeks old and we are STILL using diaper raffle diapers, and we still will for a few more weeks!)
- LOTS of wipes
- A diaper bag/backpack/huge purse for leaving the house.
- Lots of blankets! Youll always need a backup when one gets poop, puke, beverages, etc on it. Sometimes I use a second to prop up babies legs so she still thinks Im holding her.
- Which also means lots of towels/burp rags (I have found that pre-fold cloth diapers make the BEST burp rags!)
- Lots of different sized clothes (And don't get crazy - you'll be lucky to get a month out of any one garment in the first year!)
- Car seat and Stroller
- A bath - I have to say that with our first we had one that went in the tub, and it was more a pain than anything to kneel and hold him and wash him and lean over and get slippery.. ugh. This time we are Sinkin' it and I havent been happier. My back,patience, and baby appreciate it.
- Binkies - Remember that some babies LOVE them, some HATE them with a fiery passion, and some go through phases. Both of mine happen to like them and they really do their job. If my baby is tired I put that sucker in there and baby is instantly pacified, and passes right now! Please use responsibly! ;) Say what you want about pacifiers, but they greatly reduce the risk of SIDS, and my baby has been sleeping through the night since 8 weeks old! (make sure to get a few different types of binkies to try out! Babies have strong preferences about what type of paci they use! My daughter strongly preferred the NUK brand orthodontic pacifiers while my son will only use the soothies. Breastfed babies tend to prefer the MAM binks because they are flat and feel closer to the breast in their mouths)
- Small bottles (even if you are breast feeding youll want to have a couple around if you EVER want to leave the house for more than an hour without your child - and there will be days your sanity depends on it.)
- With bottles youll need nipples. Probably different types because some babies are really finicky and usually new babies dont like those cheap hard nipples. Mine doesnt care, but it doesnt hurt to have variety on hand if you are desperate at 4AM)
- Nail clippers - Those new baby nails cut like hot knives through butter on their own little faces, but imagine laying in bed resting soundly snuggled up to your precious spawn and all of a sudden youre woken up to something ripping your face, lips, and even gums apart. upon opening your eyes you see a sweet little face looking back at you wondering why you look so scared... and then theres your boobs hen you're nursing! (I have found that even with nail clippers, my son finds a way to give himself some pretty severe scratches, you may try filing baby's nails, but you could also opt to use baby mittens. They also help to prevent babies from becoming over-stimulated which can cause them to become really fussy)
- Soap and lotion (lotion only really for a lavender smell to help sooth the little one) (I'm not usually a brand loyalist, in fact I tend to prefer generics over name brand because of the cost, but the bed time lotion I received at my shower was "sesame street" brand and was very thin and watery and absorbed really fast, which made our bedtime massages a lot more difficult, so I bought a bottle of Johnson & Johnson which is much thicker and creamier and lasts a lot longer during massage time, sometimes the name-brand is just better)
And the NOT so obvious stuff I found absolutely important:
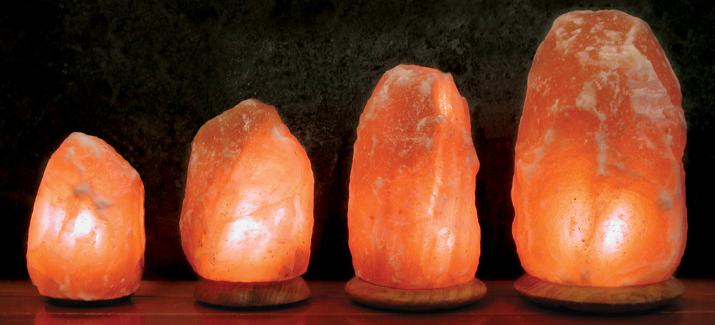
- A night light - We use a salt lamp. You want something so you can see your baby at night without having to turn lights on and disturbing your spouse. My baby actually will wake up if I turn the lamp off and before we figured to use the lamp we were leaving bathroom or closet lights on - a huge waste of electricity and money, plus it wasnt as ambient and comfortable for any of us.
- LOTS of hand soap - remember that baby is BRAND new, try not to touch her after blowing your nose, washing dishes, cleaning your older childs butt, etc! I washed my hands so much in the first month or so its not even funny. Not just for the kid, but because I didnt wanna touch my own face or food after being pooped, puked on, etc. (My personal preference is to stay away from anything that is antimicrobial or antibacterial when dealing with baby. You certainly want to keep clean because of how sensitive baby is, but I try not to use too much hand sanitizer or anti-bac. Overuse of these things can weaken baby's defenses)
- Food that is incredibly easy to cook. Crock pots are awesome for dinners, but even a health conscious mostly vegetarian like me had to eat frozen pizzas, bagels, and frozen dinners in times of desperation throughout the day when my husband was working. (we weren't prepared to have baby for another two weeks so we didn't have any of these things on hand and did a LOT of eating out and ordering in after baby was born and it cost a LOT of money, so this tip is SO important!)
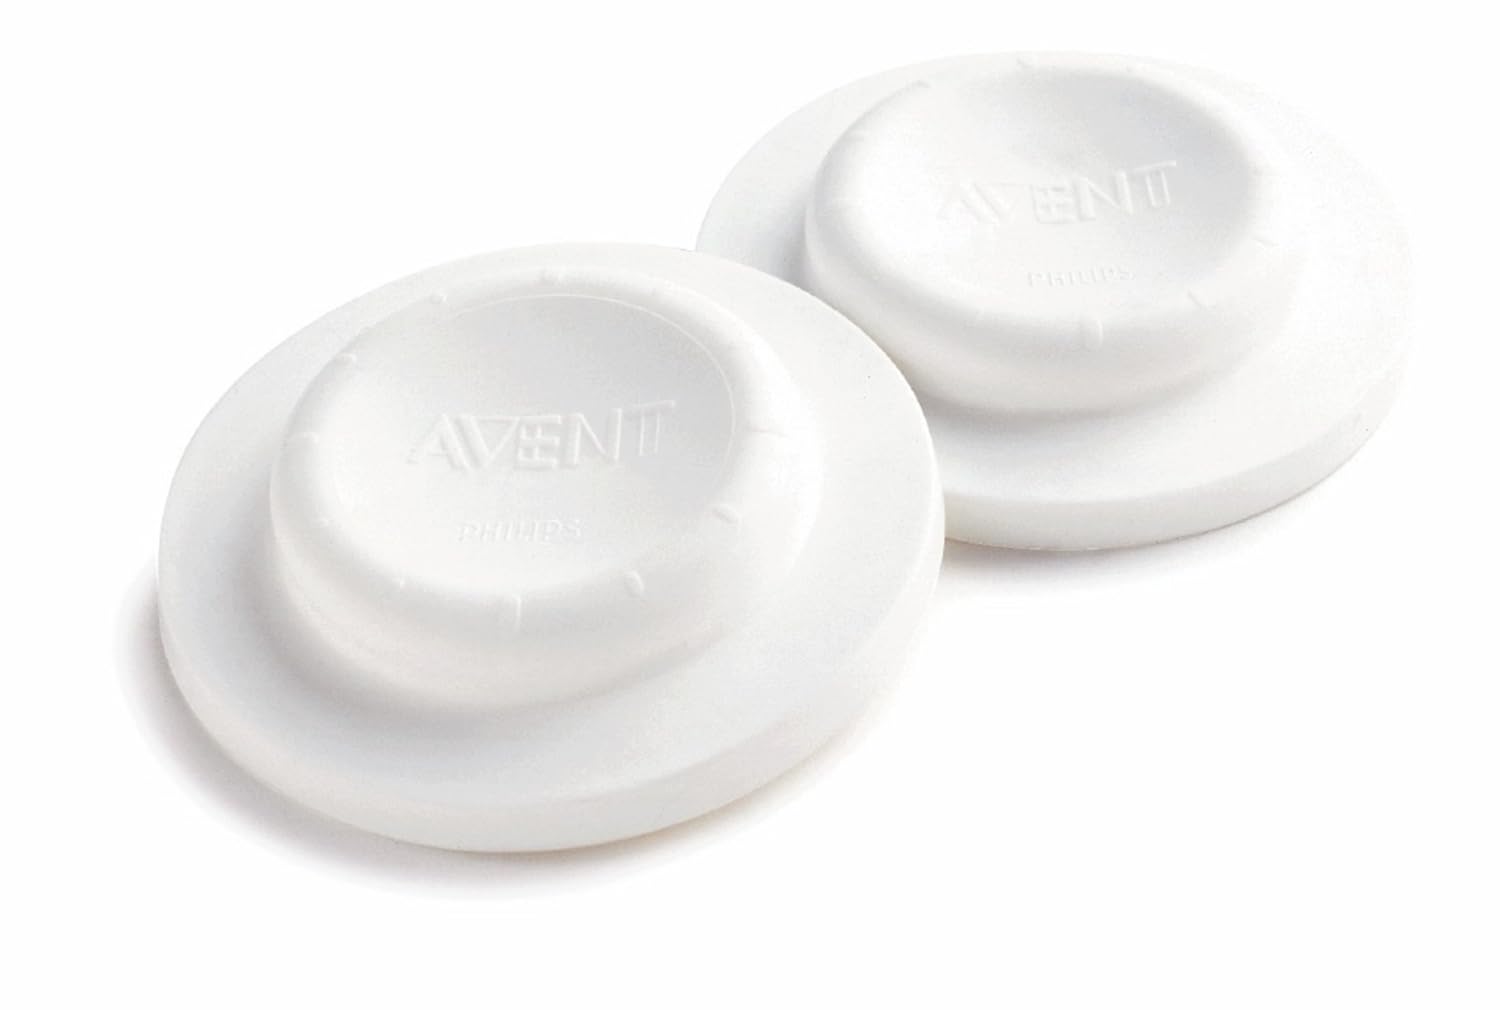
- Caps for your bottles (They are usually called "sealing disks" or something like that) - People who love me gave me packs of dozens of these things cause they get lost like crazy. I use them to store milk in the fridge, freezer, in diaper bags for travelling.. a LOT. These get overlooked I think. I seriously use at least 3 a day for various reasons. They look like this, or just flat discs:
- Gripe water - They told me that a breastfeeding baby doesnt get constipated. That may be true but she doesn't poo for days sometimes, maybe even weeks (I cant tell, I dont sleep anymore) and her gas and tummy cramps get CRAZY. Im going to make a whole post about gripe water coming up so look out for a recipe as well as things to AVOID when buying it from the store. This stuff can get expensive in the store, and Im over it!
- A noise maker - This can be anything. Babies sleep better with white noise. We have an air filter, but soft music, noise machines, even a baby monitor hum can greatly increase your chances of soothing them. (there are white noise apps that you can use if you have an extra phone or tablet that you can have on while baby is sleeping! There are also you tube videos with "womb sounds" that can help keep baby asleep just a bit longer!)
- Breast pads, especially for the first few weeks after having the baby, ESPECIALLY if youre breast feeding - you're gonna be leaking all over any social situation you get yourself into and wake yourself up drenched if you dont take my advice! ;)
- This one is a big one, and I Think its the most essential of all: Support - someone to hand the baby off to for at least 10 minutes while you regroup, hide, cry, or whatever you need to do in order to get back in the game. This stuff gets dicey sometimes and no one stays totally sane through the whole thing. (I literally count down the hours, minutes, seconds, until my husband gets home from work so I can run upstairs to write a blog, watch youtube videos, nap, facebook, whatever so I can keep my sanity!)
- With that said another very important thing you need is PATIENCE and PERSEVERANCE. (Double this if you are breast feeding) Like I said... it gets rough at times but remember every day is a little easier.. and then harder.. and then easy again. You're awesome. Every time you want to scream or cry remember that you're awesome, and you created that bundle of joy out of thin air, grew it, then popped it out. Its a huge deal and Im really proud of you! Now hand that baby to your husband and go do whatever you need to do to remind yourself that you're a human being and not a milk making slave!
Specifically and ESPECIALLY for breast feeding moms:
We already mentioned nursing pads, bottle stoppers, Boppy, a pump... but theres more!
- LOTS of water
- Soy Lecithin - This one might not be ESSENTIAL, but it was for me the second time around. I almost got mastitis so many times, and I owe this little pill a lot. Getting clogged ducts is not a fun game to play! This thins out your milk so its easier to unclog your ducts, and makes them less likely to clog in the first place.
- Bottles for storing.. or bags if you prefer.
- Nipple cream. The first few weeks of feeding with both of my kids I spent crying quite a bit until they werent hugely engorged... I have a friend whose kid literally ate off her nipples BEFORE she had teeth. Breast feeding an be a war zone, stay moisturized!
- IB Profin - I had my baby at home for one, no pain killers and no hospital. I didnt think Id need it but I did. I ESPECIALLY needed it when breast feeding became a war zone (see above) and I literally dont take any types of pills except vitamins.
Speaking of Breastfeeding...EPing (exclusively pumping)
I wanted so badly to breastfeed my son, but circumstances in the hospital made it near impossible and he wouldn't latch, so I tried to exclusively pump for him. EPing is a LOT of work. You have to pump for an hour at a time every two hours around the clock. If you skip just one session your supply will drop a LOT. The kicker is that the most important session is 2-6am as you tend to produce more milk at that time of day (thanks hormones!) Well I didn't stick to the strict schedule and slowly I dried up. After 4 weeks my sessions were so non-productive that we decided to switch to formula and our stock of pre-pumped breastmilk. But the few things I found helpful...
- Pump (duh, right?) you will absolutely need to have a medical grade pump, preferably an electric one and one that has dual capabilities. Luckily due to the Affordable Care Act that went into effect this year, insurance companies are required to pay for a medical grade dual electric pump for their insured mothers. Usually you will have an option to either buy a new one or rent one from the hospital all on your insurance company's dime.
- Multiple pump parts and bottles to pump into. I had a c-section which made it hard to go up and down the stairs to wash bottles and pump parts, so I kept a "bus bucket" (one of my daughter's old Easter buckets to be specific.) for my husband to wash for me when he got home from work, so I had to have extra everything! **HELPFUL HINT** If you're recovering from a c-section and have stairs like I do, a cooler and lots of ice packs or a mini-fridge if you have one is absolutely necessary if you have to wait all day for someone to take it to the fridge or freezer for you at the end of the day.
Friday, June 20, 2014
Eat like a fancy pants on the cheap!
Ok, so the title of this one is "Eat like a fancy pants on the cheap" but what should be tagged on to the end of the sentence is "the Japanese way:" because this episode of "how to make your life a little more awesome for less" is brought to you by RAMEN!

Whether or not you've been to college I'd put money on the fact that your early twenties was spent eating like you were trying to afford it. And why not? at 15 cents a meal (which happens to actually be delicious) its hard to beat. Then later on your got a little smarter and learned about nutrition...
You probably know now (or will learn soon) that Ramen is just carbs, sallt, and fat - and while you can get full and happy on about a dollar a day (on average) you are gonna burn out soon, and all of that thinking you like to do throughout the day will because pretty monotone.
For not much more you could actually be eating like a pro, and still have a deliciously quick and easy meal going for ya! I put all of my effort, money and work into dinners for my family. With a husband set like a lumberjack and 2 kids I dont have a lot of time but need to come up with a lot of food, and WAY too often I forget to feed myself throughout the day. Here are some of my "Ramen Hacks" that keep me and my son fueled through the day while enabling me to continue on my journey to actually having a clean house:
AS I WRITE THIS Im actually eating some AMAZING ramen. I took a package of beef ramen, cooked the noodles with an egg (like egg drop soup) some chopped green onion, a sprinkle of garlic powder, and a LOT of fresh spinach (about 2 cups - when that stuff cooks it doesnt go very far) When its done I poured a good amount of liquid out, added the flavoring powder, and then dug in! No one even missed me while I was feeding my own face - THATS how quick it was! It was SOOOO DELICIOUS that I fed it to my husband (as a way to brag about how lucky he is to have such a great wife that saves him money and feeds him nutrients) and he was impresssed!
So it isnt rocket science - and there is no recipe per se - its all up to you, but consider just keeping some staples around the house when you think you'll be broke for a while, or if you just feel nostalgic.... or really hungry for sodium.
Try some Spices like salt, pepper, garlic, powered turmeric, steak grilling seasonings.. I dunno, this is YOUR adventure!
Try these Veggies (Just toss them in the water while the noodles are cookin):
And REMEMBER - theres no reason to stay in the orient for this one. The following link has recipes for ramen Pizza, soups, salads, casseroles, omelettes, chimichangas, snack mix, even shephards pie utilizing our 15 cent buddy! CHECK IT OUT, Its actually kinda ridiculous: http://www.buzzfeed.com/ariellecalderon/27-better-ways-to-eat-ramen
Whether or not you've been to college I'd put money on the fact that your early twenties was spent eating like you were trying to afford it. And why not? at 15 cents a meal (which happens to actually be delicious) its hard to beat. Then later on your got a little smarter and learned about nutrition...
You probably know now (or will learn soon) that Ramen is just carbs, sallt, and fat - and while you can get full and happy on about a dollar a day (on average) you are gonna burn out soon, and all of that thinking you like to do throughout the day will because pretty monotone.
For not much more you could actually be eating like a pro, and still have a deliciously quick and easy meal going for ya! I put all of my effort, money and work into dinners for my family. With a husband set like a lumberjack and 2 kids I dont have a lot of time but need to come up with a lot of food, and WAY too often I forget to feed myself throughout the day. Here are some of my "Ramen Hacks" that keep me and my son fueled through the day while enabling me to continue on my journey to actually having a clean house:
AS I WRITE THIS Im actually eating some AMAZING ramen. I took a package of beef ramen, cooked the noodles with an egg (like egg drop soup) some chopped green onion, a sprinkle of garlic powder, and a LOT of fresh spinach (about 2 cups - when that stuff cooks it doesnt go very far) When its done I poured a good amount of liquid out, added the flavoring powder, and then dug in! No one even missed me while I was feeding my own face - THATS how quick it was! It was SOOOO DELICIOUS that I fed it to my husband (as a way to brag about how lucky he is to have such a great wife that saves him money and feeds him nutrients) and he was impresssed!
So it isnt rocket science - and there is no recipe per se - its all up to you, but consider just keeping some staples around the house when you think you'll be broke for a while, or if you just feel nostalgic.... or really hungry for sodium.
Try some Spices like salt, pepper, garlic, powered turmeric, steak grilling seasonings.. I dunno, this is YOUR adventure!
Try these Veggies (Just toss them in the water while the noodles are cookin):
- Spinach
- Lettuce/Cabbage
- Sprouts
- Beans
- Scallions/Green onion
- Broccoli/Cauliflower
- Carrots
- Onions
- Mushrooms
- Any frozen veggies you have inthe freezer.. even corn would be an adventure!
Try some MEAT! Any meat cooked, cubed, chopped, sliced, etc would make a FINE addition to your ramen. even if its pepporoni slices!
Try some EGGS! They are a cheap and easy way to add protein and a lot of other vitamins. This has always been the easiest way to get it into my little boy too!
(I took the following "Level system" on ideas for eggs from THIS link)
- Level 1: Hard boiled eggs are the easiest—just add the eggs to a pot of cold water, bring it to a boil, then drop in your noodles. The egg should be pretty perfectly hard boiled in just about the same time that it takes to cook the ramen through.
- Level 2: Soft boiled eggs are a tad trickier, because they involve a time. Drop them into the pot after it's come to a full boil, start a timer, and pull them out after 3 minutes for super-soft, or 5 for a fully-set white and semi-liquid yolk. I like to cut the eggs open and stir the yolk into the broth as I eat it.
- Level 3: The egg-drop method creates small curds of egg blossoms that float in the broth and coat your noodles. Lightly beat an egg in a small bowl. Once your noodles are cooked, swirl the noodles and hot broth gently around the pot. While the broth is moving, slowly drizzle in the beaten egg. It should set into fine ribbons.
- Level 4: Poached eggs will never come out perfectly shaped, but who really cares? Just cook the noodles until they've just started to separate from each other (about halfway through their total cooking time), pull the pot off the heat, break a raw egg into the center, place the lid on the pot, and let the whole thing sit for a couple minutes until both the noodles and eggs are cooked.
- Level 5: Fried Eggs require the use of an auxiliary pan and heat source. This is hyper-advanced stuff, and not to be trifled with until you've mastered all of the first-level egg techniques.*
And REMEMBER - theres no reason to stay in the orient for this one. The following link has recipes for ramen Pizza, soups, salads, casseroles, omelettes, chimichangas, snack mix, even shephards pie utilizing our 15 cent buddy! CHECK IT OUT, Its actually kinda ridiculous: http://www.buzzfeed.com/ariellecalderon/27-better-ways-to-eat-ramen
Wednesday, June 4, 2014
Need help getting veggies into your kids?
My almost-4 year old makes it pretty impossible for me to get vegetables into his body, and this is obviously a notorious problem with almost all parents. Until I figure out how to convince him that this entire diet cant consist of fruit and bread Ive been resorting to tricking him for years.
This recipe is flawless and allows you to get veggies into them in a delicious and healthy way. Best of all this recipe is entirely customizable, where you use a few necessary ingredients, but other than that you decide what your kid needs the most! Plus, as a bonus theres a quality to this recipe that makes being a mother so much easier - its fast and brainless. Nothing needs to be EXACT, so don't stress! Just dump a bunch of things into a bowl and mix it up!
So I give you.... *drum roll*
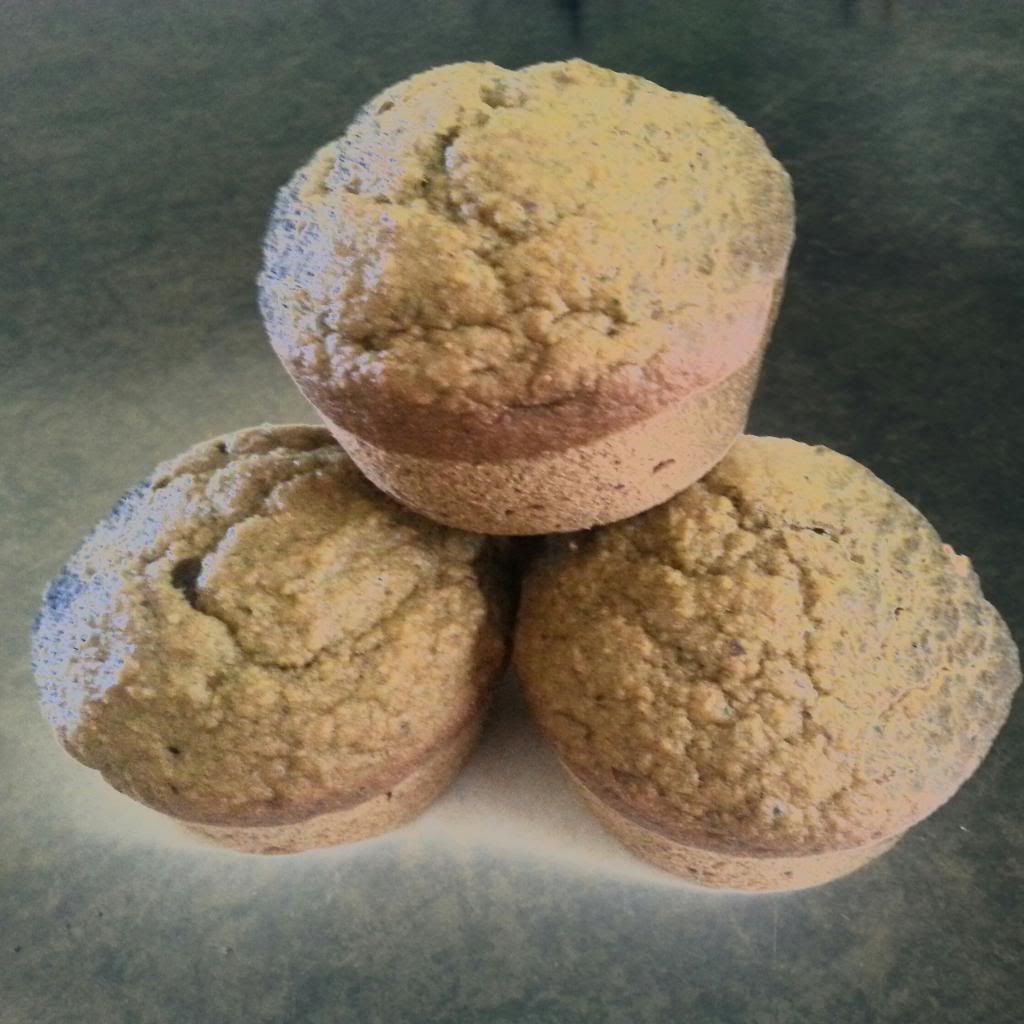
THE HOLY GRAIL OF MUFFINS!
(The number of muffins depends on the tin your using)
about 1/4 cup flax meal (optional)
1 teaspoon vanilla
2-4 teaspoons cinnamon (depending on your preference)
This recipe is flawless and allows you to get veggies into them in a delicious and healthy way. Best of all this recipe is entirely customizable, where you use a few necessary ingredients, but other than that you decide what your kid needs the most! Plus, as a bonus theres a quality to this recipe that makes being a mother so much easier - its fast and brainless. Nothing needs to be EXACT, so don't stress! Just dump a bunch of things into a bowl and mix it up!
So I give you.... *drum roll*
THE HOLY GRAIL OF MUFFINS!
(The number of muffins depends on the tin your using)
2
cups whole wheat flour (or what you have on hand)
about 1/4 cup flax meal (optional)
1/4-1/2 cup whole oats (optional)1
teaspoon baking soda
1/4 teaspoon salt
1/4 cup unsalted butter, softened
about 1/3 cup brown sugar (or other sweetener if you prefer)
2 -3 tablespoons honey (optional - but really adds to the texture and taste)
1 egg
about 3 cups vegetables - Use anything you like, its gonna be blended together. (I use carrots, zucchini and spinach regularly, but you can even use banana, applesauce, berries, etc.)
1 teaspoon vanilla
2-4 teaspoons cinnamon (depending on your preference)
I throw a little turmeric in there too.. just a small amount. It adds color, cancer fighting properties, and a million other great things into the body.
Like I said, mix it up - different veggies, different additives like the flax or oats just to add nutrients. If your kids like nuts Id suggest almonds, too!
- None of this has to be in any specific order, either....
- Get the butter out and throw it in a bowl so it will soften up while you get the rest of the ingredients in there!
- First you want to Puree any of the non-basic ingredients. The veggies, oats, nuts, etc. I even put the brown sugar in the food processor just to make sure it gets broken up. Put it all in there. Puree it until its the consistency of baby food or applesauce.
- Put the processed food into a bowl, and add the rest of the ingredients.....
- Heat the oven to 350.
- Get our your mixer and blend it all up!
- Fill the cups in a muffin tin to about 2/3 full
- Bake for 25 minutes!
VOILA! Yummy muffins for pesky children! Good luck getting them to want anything other than muffins after this though....
Tuesday, May 20, 2014
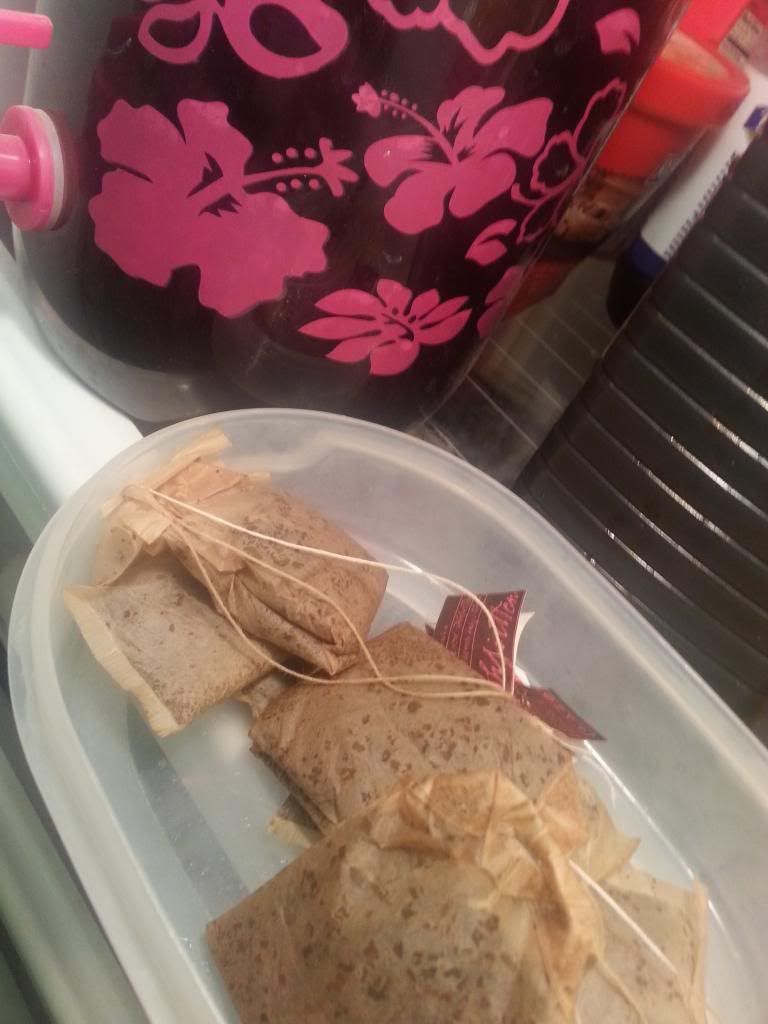
Don't throw em away! Uses for Used tea bags
Yeah, You got me... I don't like to just throw things away...
At least I'm not a hoarder...
And at least I have the decency to let YOU know what you can do to be more frugal in your life too.
And here is where I would normally explain to you why going green and being a frugal mommy dont really stray far from each other - but I would be digressing, and neither of us would really be benefiting, right?
I'll just get right down to it. DON'T JUST THROW EM AWAY.... but don't hang on to them for too long either... eww. Mold and mildew would love for you to, but you're smarter than that - and after this post you're gonna have way too many fun uses for those bags. You''ll be making and drinking more tea just to feel prettier and smarter! Leave a comment later, thanking me - if you ever have time!
Uses for uses (black) tea bags.
(remember that the tea has to be caffeinated unless otherwise specified- this tea contains "tannins" which will be mentioned quite a bit!)
If you know of any more leave a comment! Thanks! I hope This info helps!
At least I'm not a hoarder...
And at least I have the decency to let YOU know what you can do to be more frugal in your life too.
And here is where I would normally explain to you why going green and being a frugal mommy dont really stray far from each other - but I would be digressing, and neither of us would really be benefiting, right?
I'll just get right down to it. DON'T JUST THROW EM AWAY.... but don't hang on to them for too long either... eww. Mold and mildew would love for you to, but you're smarter than that - and after this post you're gonna have way too many fun uses for those bags. You''ll be making and drinking more tea just to feel prettier and smarter! Leave a comment later, thanking me - if you ever have time!
Uses for uses (black) tea bags.
(remember that the tea has to be caffeinated unless otherwise specified- this tea contains "tannins" which will be mentioned quite a bit!)
HEALTH AND BEAUTY
- Plantar Warts! Just press a wet, warmed tea bag directly on the area for ten to fifteen minutes and let the skin dry naturally. Repeat this daily in one to two weeks that bad boy should be gone! (Let me know if this works, I've never actually had a wart but I've read in a lot of different places that this is a GREAT remedy)
- Any kind of tea can soften your skin (the antioxidants in green tea are particularly effective) so throw some tea bags in the bath and soak in that delicious goodness - PLUS, I think you'll smell great after!
- The tannins in the tealeaves will stimulate blood circulation and diminish the bags and dark circles under your eyes. Rest either warm or cold bags on your eyes for a few minutes and check out the results! When I get around to it Ill ad a before and after to this post. (Im a great tester since I just had a baby and rarely sleep)
- A facial toner!? VOILA! The astringency absorbs greas, so quickly wipe a tea bag over your trouble zones and then blot with a clean towel.
- Soothe razor burn and relieve nicks and cuts by pressing a wet tea bag to your skin. Not only will the tea take some of the sting out, it will also stop the bleeding.
- Warm up a brewed tea bag, take the leaves out of it, roll them in a scrap of fabric, and use as a compress for a painful toothache, canker sore, or fat lip
- Drain a blister or abscess without pain by covering the affected area with a wet tea bag overnight; you'll see results by the time you wake up the next morning.
- Tea bags will bring comforting relief if you have a bruise, sunburn, bee sting, mosquito bite, run in with Poison Ivy, or cold sore, reduce inflammation, and promote healing. Put a cool, damp tea bag on the affected area and use like a compress.
- The antioxidants and tannins in the tea will tighten your pores, reduce puffiness, and leave your face glowing! Put the used tea bag in a bowl steaming water, place a towel over your head and let your face soak up that tea-steam!
- Alleviate sore or bleeding gums by putting a cooled, used tea bag over the problem spot. Tannins constrict blood vessels, which will stop the bleeding, and they reduce the swollen tissues that cause soreness.
- Give your feet a daily tea bath that calms and restore. Toss 3 or 4 bags in some hot water and let it steep for about 15 minute (or long enough for the water to cool to a good temp for your footsies.) Then soak for 20-30 minutes. This also gets rid of stinky feet!
- Rinse your hands with water and a brewed tea bag to remove food odors like onions and fish!
IN THE KITCHEN
- Cook an incredibly moist turkey by adding a brewed tea bag and a cup of water to the pan. The tannin in the tea is a natural meat tenderizer and adds a unique, delicious flavor.
- Soak grungy dishes overnight with hot water and a few brewed teabags and the tannins from the tea with break down the grease by morning.
- A brewed tea bag will do the same thing as baking soda in your fridge and sucks up odors!
AROUND THE HOUSE
- Deodorize stuffy rooms by pouring one quart twice-brewed tea and four tablespoons lemon juice or your favorite essential oil in a spray bottle.
- Clean dark leather shoes by wiping a damp tea bag in a circular motion.
- Put a wet tea bag or the leaves from a wet tea bag into your ashtray. When someone ashes into the tray the wet leaves will hold the ash and absorb some of the smell from the smoke!
- Just sprinkle the dried out contents of a brewed tea bag into kitty litter and the tea will help neutralize the smell!
- If you sprinkle the damp tea leaves from a brewed tea bag over the ashes in your fireplace before cleaning it out, the tea will keep the ashes from rising and making a mess when you lift them out.
- Wipe cast-iron pots and pans with a brewed tea bag to remove and prevent rust.
- Empty the dry contents from several brewed tea bags onto smelly carpets or pet bedding, allow to settle for ten or fifteen minutes, then deodorize the area when you vacuum and leave the refreshing scent of tea behind. This will also deodorize the vacuum cleaner bag at the same time.
- Your grandma probably taught you THIS one! Make your mirrors sparkle and shine by using cooled, twice-brewed tea as a cleaner. Just dip a soft cloth in the tea and use it to wipe away dirt and grime, and then buff dry.
- Use the teabags to rub furniture and floor scratches to make them disappear.
- Carefully spray diluted black tea on the carpet to kill dust mites. Color-test the tea first in an inconspicuous spot.
OUTDOORS
- Acid-loving plants like citrus, ferns and roses LOVE Tea! Especially in Arizona, since the ground is dutifully lacking in acid. The tannic acid and other nutrients will be released when you water the plants, spurring their growth.
- And for healthier potted plants, place a few brewed tea bags over the drainage hole at the bottom of the planter before potting. The tea bags will retain water and leach nutrients to the soil.
- Speed the decomposition process and enrich your compost pile by pouring a few cups of strong, twice-brewed tea into the heap. The liquid tea will hasten decomposition and draw acid-producing bacteria that will create acid-rich compost. If you remove the staples first you can just toss those buggers in your compost pile whole!
If you know of any more leave a comment! Thanks! I hope This info helps!
Subscribe to:
Posts (Atom)